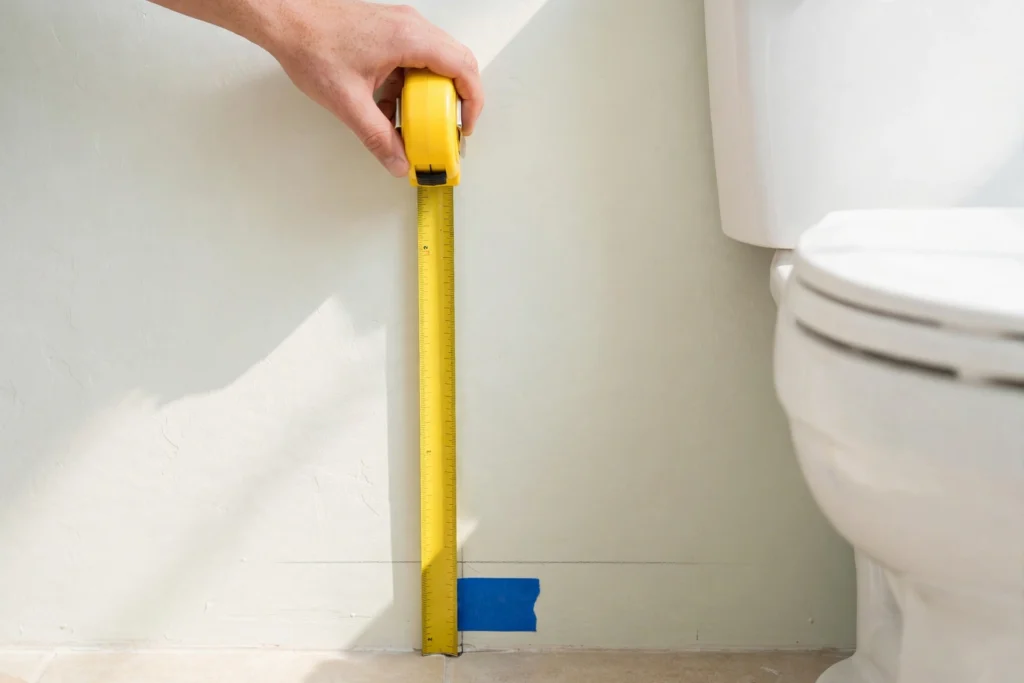
A toilet paper holder goes 26 inches above the floor, measured to the center of the roll, and 8 to 12 inches forward of the front edge of the toilet bowl. That is the NKBA standard, and it puts the roll exactly where a seated person can reach it without twisting or leaning. The whole job takes about 15 minutes with a drill, a level, and the hardware that comes in the box — as long as the spot is measured from the right place before the first hole is drilled.
That last part is where most installations go wrong. The height and distance numbers are easy to find; the reference point is not. Measure from the wrong edge and the holder ends up behind the sitter, too high, or too far to reach — and the fix means patching holes and starting over. This guide walks through the method that avoids that: measure from the bowl, test the spot while seated, then drill once.
The Measurement Most People Get Wrong
Ask where a toilet paper holder goes and every guide gives the same two numbers: 26 inches up, 8 to 12 inches out. What almost none of them say clearly is measured from what. The 8-to-12-inch distance is measured forward from the front edge of the toilet bowl — not from the wall behind the toilet, not from the tank, and not from the center of the bowl. The 26-inch height is measured from the finished floor to the center of the roll, not to the mounting screws, which sit above, below, or beside the spindle depending on the holder design.
Getting the reference point wrong produces the single most common placement mistake: a holder mounted level with the tank, behind the seated person, so every reach means twisting around. It looks fine on the wall and feels wrong every single day. Measure from the front edge of the bowl and the holder lands beside the hip, where the hand falls naturally. The same measuring mistake shows up with hooks — the guide to how high to install bathroom hooks covers the same principle for towel and robe hooks, where a few inches in the wrong direction makes the same kind of daily annoyance.
| Who It Is For | Height (Floor to Roll Center) | Distance Forward of Bowl Front Edge |
| Most adults | 26 inches | 8 to 12 inches |
| Children and shorter users | 26 inches (or slightly lower) | 8 to 9 inches |
| Taller users | 26 to 28 inches | 10 to 12 inches |
| Accessible bathroom (ADA) | Outlet 15 to 48 inches | 7 to 9 inches |
Two more checks before marking anything. First, keep the roll within 12 inches laterally of the bowl’s edge — farther than that and the sitter has to lean sideways; closer than about 4 inches and knuckles graze porcelain. Second, if the side wall is very close to the toilet, check knee clearance: a wall closer than 12 inches to the bowl centerline can put the holder in the path of a knee when standing up. A quick sit-and-stand test, covered next, catches both problems before any holes exist.
The 60-Second Sit Test (Do This Before You Drill)
Numbers on a page are a starting point, not a verdict — bodies and bathrooms vary, and the only way to know a spot works is to try it. Before drilling, do this: sit on the toilet, close the lid if that is the normal position, and reach for where the roll would be. The motion should feel like nothing — no twist in the lower back, no lean forward, no stretch. If the shoulder lifts or the back twists, the spot is wrong, no matter what the tape measure says.
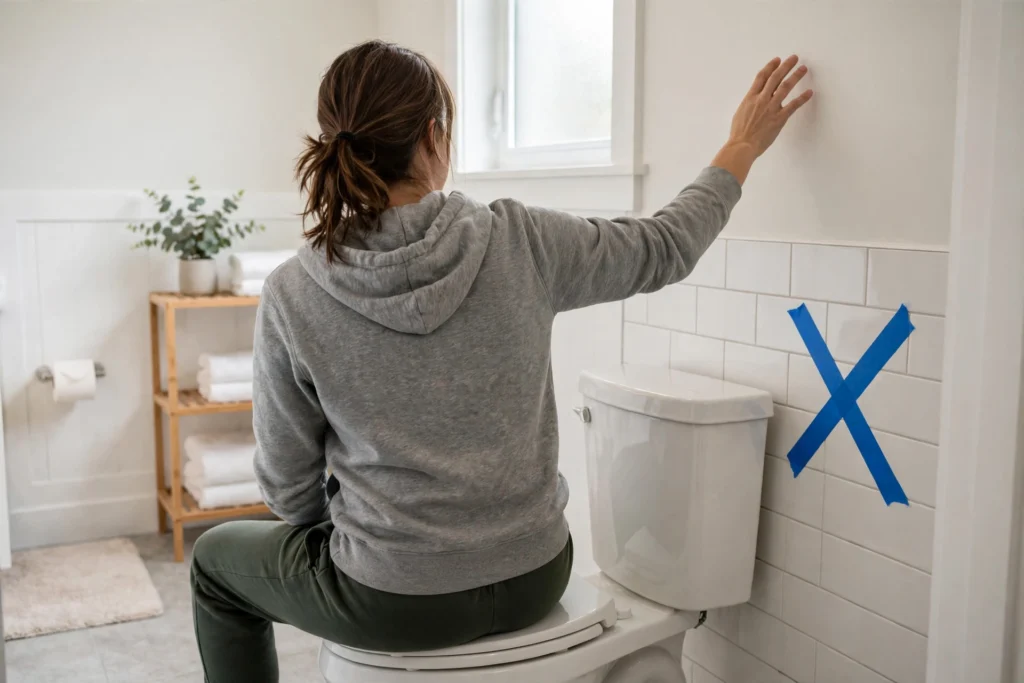
Once the reach feels right, mark it. Stick a small piece of painter’s tape on the wall at the spot and draw an X where the center of the roll should sit — that X is the spindle center, and every other mark in the install is measured from it. Put a full roll on the holder later and hold the whole assembly against that X to confirm the roll spins freely and clears the leg. For a comfort-height toilet, whose seat sits 17 to 19 inches off the floor, start the test at 28 inches rather than 26 — taller seats raise the whole reach geometry, and the sit test will confirm whether 28 feels better than 26.
This is also the moment to settle the household question: if children use the bathroom, test the spot from a child’s seated height too. A holder placed for an adult at 10 to 12 inches forward can be a stretch for a small child, and the 8-to-9-inch position usually serves both. When one bathroom serves very different heights, splitting the difference around 9 inches forward with the roll at 26 inches is the compromise that disappoints nobody.
Know Your Holder: Single-Post, Double-Post, Pivot, or Recessed?
Not all toilet paper holders install the same way, and the type decides what the wall has to accept. A single-post holder needs one bracket and is the easiest install there is — one set of screws, no levelling between two points. A double-post holder with a spring-loaded rod needs two brackets set perfectly level and at exactly the right distance apart; a quarter-inch error either way means the spring rod falls out or binds. A pivot-style holder also uses two brackets, but one side has an attached arm that lifts to load a new roll, which is easier one-handed than a spring rod. A recessed holder sits inside the wall and needs a clear cavity 3.5 to 4 inches deep, free of pipes and studs — a bigger job that is best planned before the wall is finished.
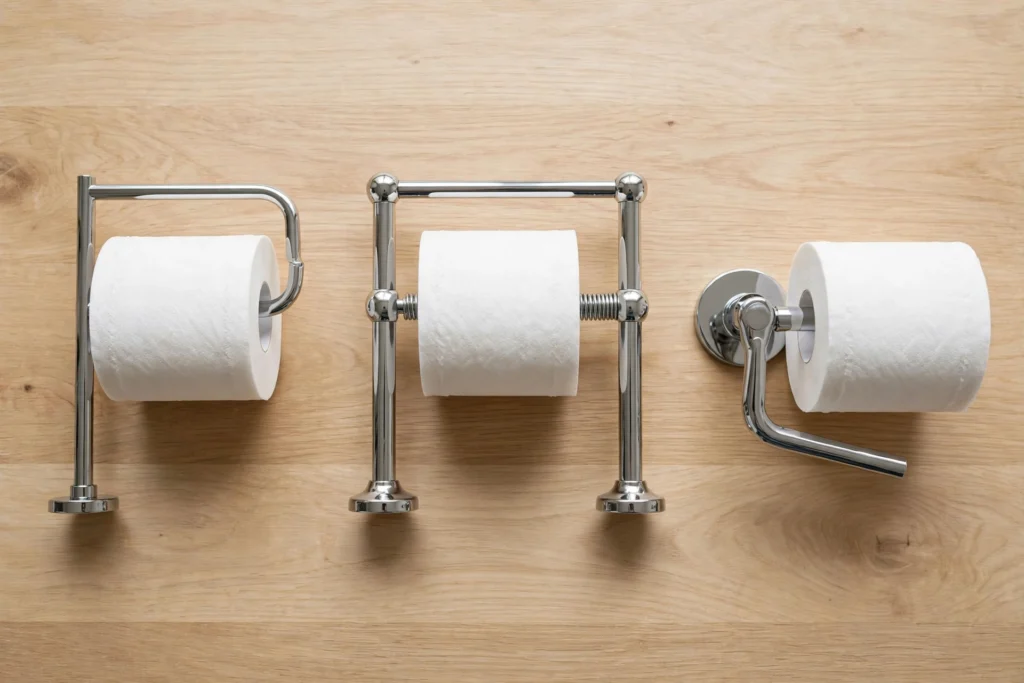
The mounting system matters as much as the type. Most modern holders use a concealed bracket: a metal plate screws to the wall first, the decorative holder slides over it, and a tiny set screw — usually on the underside of the base, tightened with a small hex key — locks it in place. Older and budget holders use exposed screws through visible holes in the base. Adhesive holders skip screws entirely and stick to smooth tile or glass. Knowing which system is in the box before marking anything prevents the most frustrating mid-install surprise: discovering the bracket needs two holes where one was marked. If no holder has been bought yet, the guide to the best chrome toilet paper holders compares the common types and finishes, which makes it easier to pick a design whose install matches the wall it is going on.
Tools and Hardware You’ll Need
The tool list is short: a tape measure, a pencil, painter’s tape, a level, a drill with bits matched to the wall material, a screwdriver or the hex key that fits the set screw, a stud finder, and the holder with its mounting hardware. Most holders include a paper template — use it. Tape it to the wall at the marked spot and it shows exactly where to drill, which removes the guesswork from a two-bracket holder.
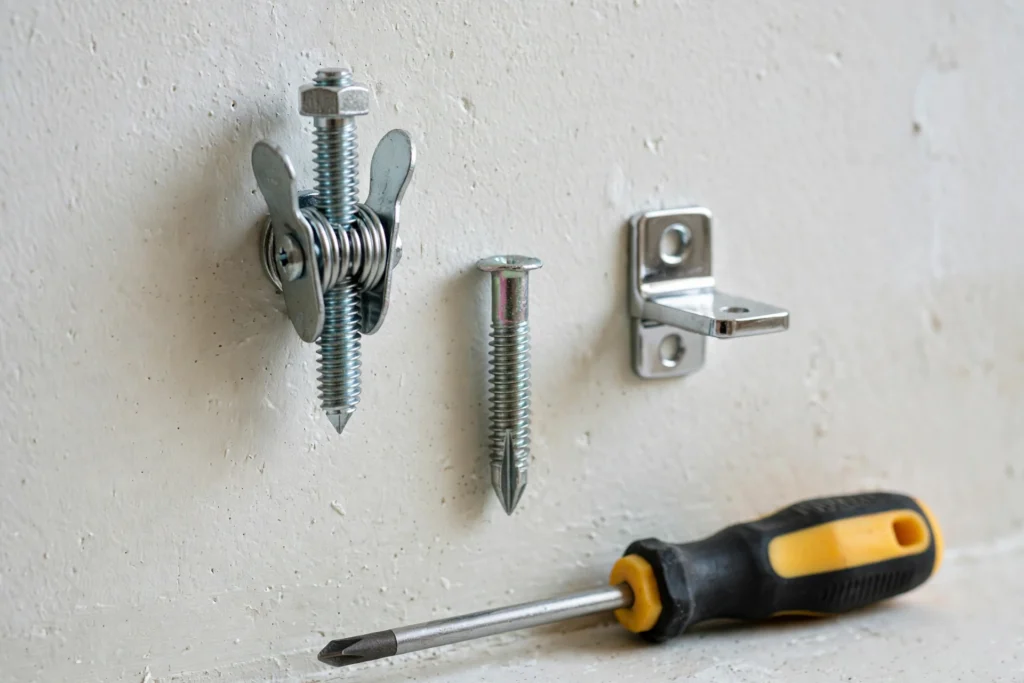
One thing worth upgrading before starting: the anchors. The thin plastic wall anchors included in many kits are the weak link in the whole install — they collapse, spin in an oversized hole, or pull out under a sideways tug. For drywall, a pack of self-drilling threaded anchors or toggle bolts costs a few dollars and holds far better. A toilet paper holder carries almost no weight, so the anchor does not need to be heavy-duty — it needs to be the right one for the wall. Match the drill bit to the anchor, not the screw: a bit the same diameter as the anchor shank, or slightly smaller, keeps the fit tight.
How to Install a Toilet Paper Holder, Step by Step
With the spot tested and the holder type known, the install itself is straightforward. The same concealed-bracket system shows up on robe and towel hooks too — the step-by-step guide to installing robe and towel hooks covers the identical bracket-and-set-screw method for a different fixture, which is useful if the bathroom is getting several pieces mounted the same afternoon.
- Mark the spindle center. Measure 26 inches up from the finished floor and 8 to 12 inches forward of the front edge of the bowl, and mark the X on a small piece of painter’s tape. Measure after the flooring is down — tile thickness changes every height mark.
- Set the template and check level. Tape the paper template over the X, or hold the bracket itself against the wall. For a double-post holder, mark one side first, then use the level to find the second side — both brackets must sit on the same horizontal line or the spring rod will bind. Double-check with the level before drilling anything.
- Check what is behind the wall. Run the stud finder over the marks. A stud means screws go straight into wood with no anchors needed. No stud means anchors. Also confirm there is no plumbing behind the spot — a holder never needs the water turned off, but drilling into a pipe is the one mistake that turns a 15-minute job into a plumber’s visit.
- Drill the holes. Make a small indentation on each pencil mark with a nail so the bit does not wander. Drill with the bit matched to the anchor, straight and steady. On drywall, drill just deep enough for the anchor; on tile, see the section below.
- Set the anchors and screw on the bracket. Tap wall anchors in gently with a hammer until flush, then drive the screws through the bracket into the anchors (or directly into the stud). The bracket should sit flat against the wall with no rocking — a rocking bracket now means a wobbling holder later.
- Mount the holder and test it. Slide the holder over the concealed bracket and tighten the set screw underneath with the hex key — snug, not forced. Load a full roll, give it a spin to confirm it turns freely, and pull the paper the way it will be pulled daily. If anything moves, the set screw or the anchors need attention before the job is called done.
Installing on Tile Without Cracking It
Tile is the wall type that makes people nervous, and the nervousness is justified — a cracked tile is a much bigger repair than a patched drywall hole. The method is unhurried: tape an X of painter’s tape over each drill mark so the bit cannot skate across the glaze, fit a masonry or carbide-tipped bit, turn the drill’s hammer function OFF, and drill at low speed with light, steady pressure. Let the bit do the work. The glaze is the hard part; once through it, the tile body drills easily.
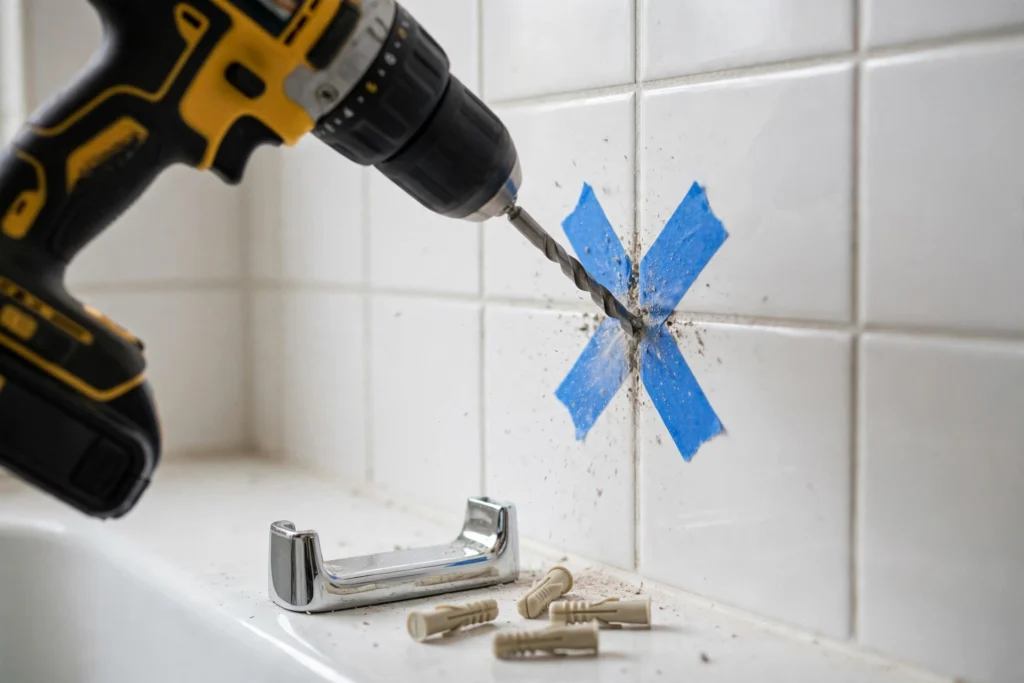
Never use hammer mode on tile, and never force the drill — pressure and speed are what crack glaze. Once the hole is through, tap the wall anchor in very gently; a hard hammer blow on a tile anchor is the second most common way tiles crack. If the tile is a large-format porcelain, expect the drilling to take a little longer and keep the bit cool with a few drops of water. And if the layout allows it, drilling into a grout line instead of the middle of a tile is the safest spot of all — a cracked grout line is a five-minute repair, a cracked tile is not.
No Stud, No Side Wall? Your Options
The ideal install — a stud, a side wall, a level line — does not exist in every bathroom. The fallback depends on what is actually there.
No stud, plain drywall. This is the most common case and it is not a problem. Self-drilling threaded anchors screw straight into drywall and hold a toilet paper holder easily; toggle bolts are the stronger option and the right call if the holder will get tugged sideways by children or a heavy roll. Either beats the plastic anchors from the box.
A vanity beside the toilet. The side panel of a vanity cabinet is a solid mounting surface and often the most convenient one — it sits exactly where the hand falls. Check two things first: that the panel is thick enough to take a screw without poking through, and that the holder will not block a drawer or door from opening. A holder mounted over a drawer front that cannot open is a mistake discovered too late.
No drilling allowed. Renters and tiled walls that must stay untouched have two real options. Adhesive holders bond to smooth tile or glass and hold a standard roll well — but they will not hold on textured walls, painted drywall, or wallpaper, and they need a full 24 hours to cure before a roll goes on. A freestanding holder needs no mounting at all and moves wherever it is needed. The guide to the best freestanding toilet paper holders compares the stable options, including weighted bases that do not tip when the roll is pulled.
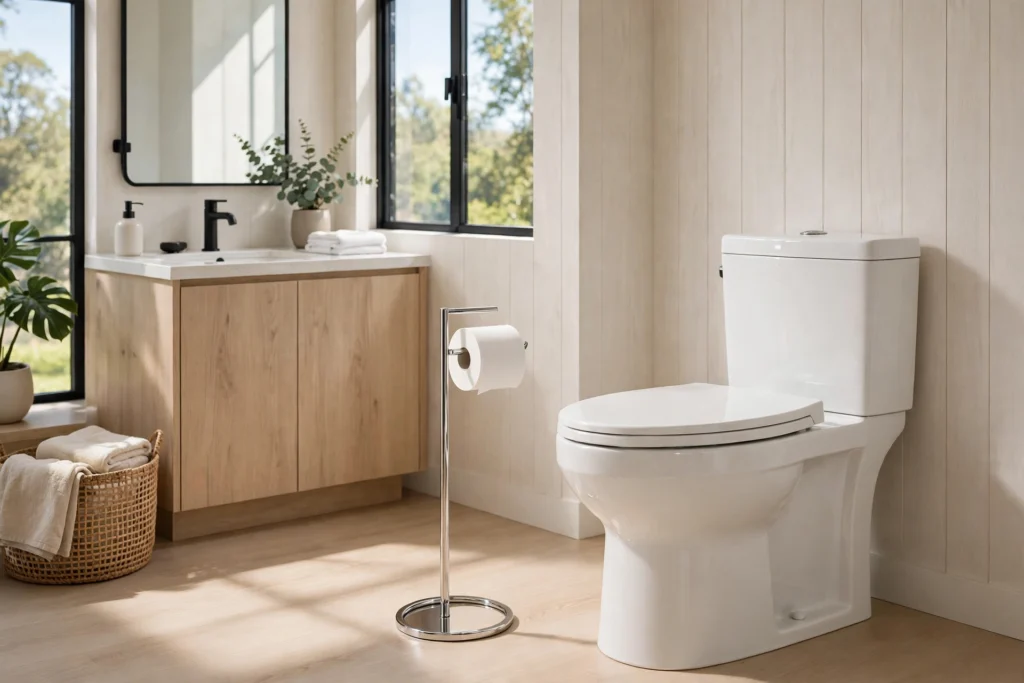
No wall within reach at all. In a powder room where the toilet sits between a vanity and a door, or a wall-hung toilet with open space beside it, a freestanding holder is the only sensible answer — a holder screwed to a wall two feet away will never be reached comfortably, and a bad reach is worse than no holder.
Why Holders Wobble — and How to Fix a Loose One
A holder that wobbles has one of three causes, and each has a different fix. The most common is the set screw: the tiny screw under the base works loose over months of tugging, and the holder starts rocking on its bracket. The fix is a hex key and thirty seconds — tighten it until snug. If it keeps loosening, a single drop of thread-locking fluid on the screw threads holds it without making it permanent.
The second cause is the wrong anchor: the plastic anchors from the box spinning in an oversized hole, or screws driven into bare drywall with no anchor at all. The fix is to pull the bracket, fit a self-drilling anchor or a toggle bolt in a fresh spot slightly offset from the old hole, and re-mount. A stripped drywall hole will not hold a bigger screw — it needs a proper anchor, not a thicker screw.
The third cause is a bracket that was never flat: screws tightened unevenly, or a bracket mounted over a tile edge or a grout ridge so it rocks. Loosen the screws, check the bracket sits flat with no gap behind it, and re-tighten evenly. A thin washer behind one side can level a bracket on an uneven surface. Once a year, check the mounting screws on every bathroom fixture — daily tugging and humidity cycles loosen them slowly, and a yearly check catches a wobble before it becomes a hole in the wall.
Placement for Kids, Tall Users, and Accessible Bathrooms
One height does not serve every household, and the standards agree on that. For children and shorter users, 8 to 9 inches forward of the bowl with the roll at 26 inches — or an inch lower — keeps the paper within easy reach without a stretch. For taller users, 10 to 12 inches forward and 26 to 28 inches high matches a longer reach and a higher seated position. When the bathroom serves both, the 8-to-9-inch forward position at 26 inches is the compromise that works for nearly everyone.
Accessible bathrooms follow a different rulebook: ADA Standard 604.7 requires the dispenser outlet to sit between 15 and 48 inches above the floor, with the centerline 7 to 9 inches in front of the toilet. The ADA minimum height of 15 inches is lower than the residential 26-inch standard because it is designed for wheelchair reach. In a bathroom used by both seated and standing users, splitting the difference around 20 to 24 inches high with the 7-to-9-inch forward position serves both reasonably well — and whatever height is chosen, the holder must never sit behind a grab bar, where the bar blocks the reach.
Conclusion
Installing a toilet paper holder is a 15-minute job, but only the measuring takes any thought — and the measuring is the whole job. Measure 26 inches up and 8 to 12 inches forward of the front edge of the bowl, sit down and test the reach before drilling, match the anchor to the wall, and tighten the set screw when the holder goes on. Get those four things right and the holder stays put, stays level, and stays exactly where the hand expects it. If the holder itself is still undecided, the Toilet Paper Holders archive collects every holder guide on the site — types, finishes, freestanding options, and the installation guides that go with them.