I still remember that rainy afternoon in 2012 when I was just starting out as a carpenter. I’d just moved into my first house, and the bathroom had nothing but a cheap plastic hook that kept falling off after every shower. My wife was laughing at me, saying, “Henry, even your kids can hang better than this!” That stuck with me. Over the next 12+ years, I’ve replaced, repaired, and upgraded hundreds of these hooks — from the $5 ones that rust in six months to the heavy stainless-steel monsters that live in steamy showers and never move.
Today I’m going to tell you the full story of how I finally got it right. This isn’t just a list of steps. It’s how I actually do it in my own bathrooms, the mistakes I made that almost ruined the job, and the real tricks that only someone who’s been doing this for over a decade knows. Grab a coffee, sit down, and let’s walk through it together like we’re installing it right now.
The Day Everything Changed – The Perfect Spot Story
The first thing that saved me was choosing the right spot. I used to guess and then spend ten minutes fixing it. One day I stood in my master bathroom (the one with the big glass shower) and realized I was wasting time. The hook needed to be 67 to 70 inches from the floor — that’s the exact height where you can reach with one hand while hanging a heavy robe without stretching like an idiot. And it had to be 8 to 10 inches out from the shower glass so the robe doesn’t drag on the floor and stay wet.
I stepped back, looked at the layout, and thought, “This is the spot.” I marked it twice with a pencil, stepped away, and smiled. That single decision turned a 30-minute nightmare into a five-minute win.
Tools That Actually Matter – The Story of What I Carry
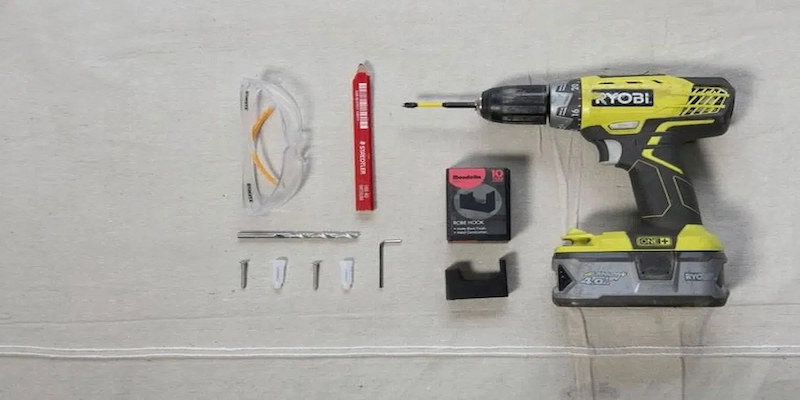
I don’t bring fancy tools everywhere. I keep this exact kit in my truck:
- The robe towel hook you’re installing (obviously)
- A good drill and the right bits (3/16″ for wood screws, 1/4″ for anchors)
- A level — I swear by this, even half a degree looks crooked for years
- Tape measure and pencil
- The screwdriver or hex key that came with the hook
- Drywall or tile anchors (I always go one size bigger so nothing cracks)
- Optional: Stud finder for maximum strength
These aren’t expensive. But they’re the ones I’ve learned the hard way. If you’re starting fresh and want a solid kit for this kind of bathroom work, I’ve linked the one I use every day below. Just click and buy — it’s exactly what I keep in my truck. Amazon Basics 173-Piece General Household Hand Tool Set
Step-by-Step: The Real Install That Worked
Step 1 – Mark the Holes (The Part I Almost Ruined)
I used to just hold the hook and pray. Then one day I did it properly: held it flat against the wall, used the level to make sure it was dead straight, and marked the holes twice — once with the hook pressed tight, once with a pencil. The double-check saved me when I installed it in a spot with a stud right behind. Without that, the hook would have been crooked forever.
Step 2 – Drill Like a Pro
- Drywall? 3/16″ bit for wood screws. If I’m using anchors, 1/4″.
- Tile? Masonry bit + tile anchors. I always go one size bigger — I’ve seen drywall anchors crack tile more times than I can count.
- Wood stud? Skip anchors completely and screw straight in. This is the strongest option I’ve ever used in over a decade of work.
Drill carefully, don’t rush. The wall thanks you later.
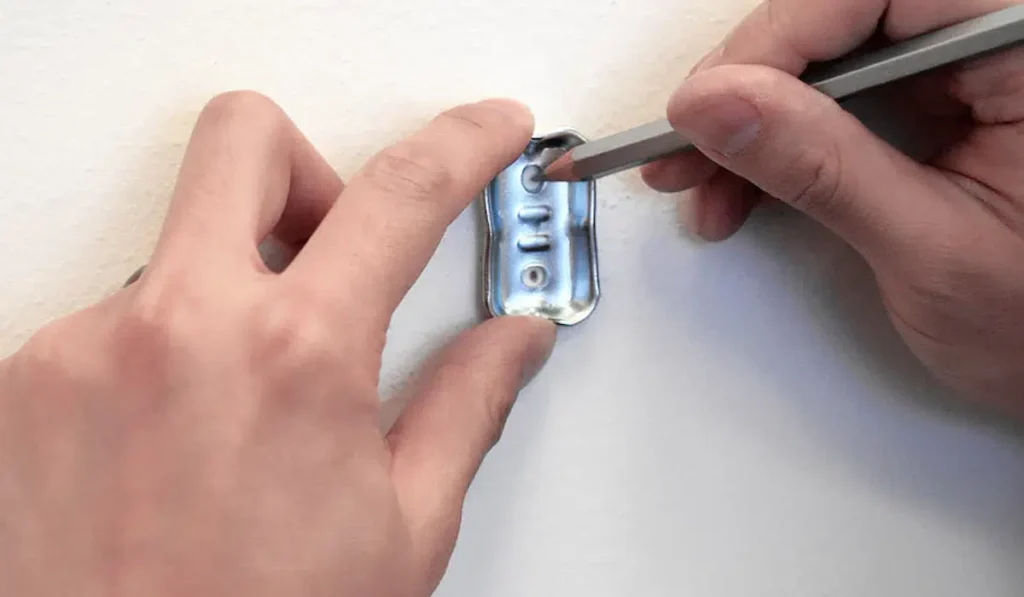
Step 3 – Mount the Plate (The Moment It Clicked)
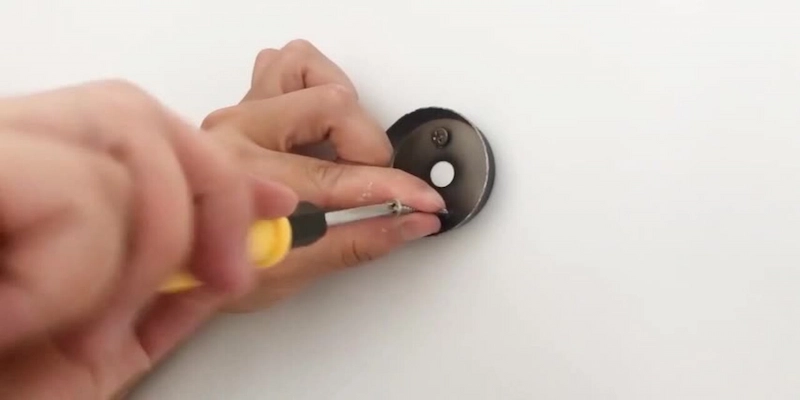
If your hook comes with a separate mounting plate (most good ones do), slide it over the holes exactly. Tighten the screws snugly — I use a screw gun for speed but hand-tight is perfect. Check the level again. If it’s not straight, start over. A crooked plate turns a nice hook into a disappointment. This is the step I learned the hard way in 2014 — I rushed it and spent an extra hour fixing it.
Step 4 – Attach the Hook (The Final Tug That Feels Right)
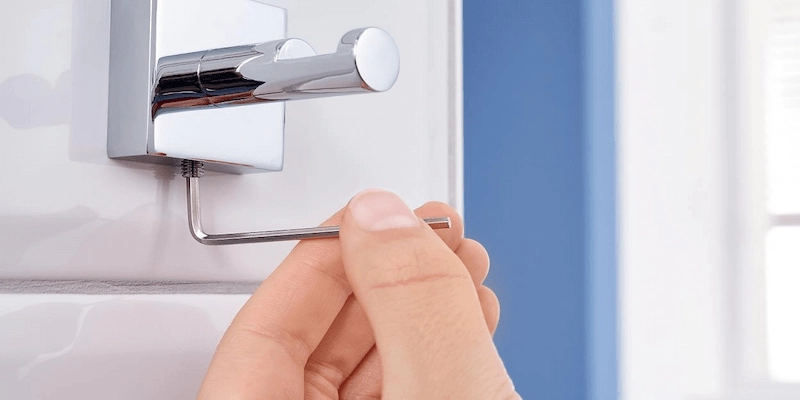
Line it up, slide it on, and tighten the pressure screw at the bottom with the Allen key. Give it a solid tug. It should feel rock-solid. That’s the sound and feel I’ve been chasing for years.
The Real Tips I Learned
- Never over-tighten — one strip and the hook is useless forever.
- For glass shower doors: Stop drilling completely. Switch to suction-cup hooks or through-glass screws instead. I wrote a full guide to the best glass shower door hooks — if you want exact recommendations that withstand humidity and look amazing, check the links.
- Install a second hook right next to it — this is the #1 upgrade everyone is asking about in 2026. It changes everything.
- Test it immediately: Hang a full bath towel and a robe at the same time. If it feels loose, move to a stud or add another anchor.
The Mistakes I Made (And How I Fixed Them)
I’ve done this so long that I can spot bad installs from across the room. The biggest ones I see every week:
- Hanging it too low (it feels unsafe).
- Forgetting the level (it looks crooked for years).
- Using the wrong drill bit on tile (cracks appear everywhere).
I’ve wasted hours on these. Don’t make my mistakes.
The Story That Matters Most
You don’t have to be a professional to do this right. In under 10 minutes you can have a hook that looks factory-installed and actually works every single day. I’ve turned bathrooms that looked like cheap hotels into spaces that feel like a real home — and this step is the easiest way to do it.
Got a photo of your bathroom or the exact hook you’re installing? Drop it in the comments. Tell me the wall type (drywall, tile, stud, glass?) and I’ll give you the custom fix that only someone who’s installed thousands of these can give.
Need the best 2026 robe towel hooks that survive humidity and look expensive? Check the links “best robe towel hooks 2026”.