An adhesive hook comes off a wall cleanly for one reason: the bond is weakened before anything is pulled. Yank a foam-pad hook straight out and the weakest layer gives way — usually the paint. Warm it, work it loose a little at a time, and the same hook can come off with nothing left behind but a clean patch.
The short answer: To remove an adhesive hook without damaging paint, take everything off the hook, warm the pad with a hairdryer on low or medium heat, then lift one corner and peel slowly at a low angle, close to the wall. For a thick foam pad, saw through the foam with dental floss first and deal with the flat residue that is left. Clear residue gentlest-first — fingertip roll, warm soapy water, then isopropyl alcohol on a tested spot — and never scrape painted drywall with a metal blade.
First, Identify What Kind of Adhesive Hook You Have
Not every adhesive hook releases the same way, and using the wrong method is how paint gets torn. Look at the back of the hook before you touch it.
A thick foam pad is the most common bathroom hook: a grey or white foam square, a few millimetres thick, stuck flat to the wall, with no pull tab. This guide is written for this kind. A thin clear tape hook is flatter and usually peels more easily once warmed, and a gel hybrid feels rubbery and often lifts with a slow peel once an edge is worked free.
If the hook has a visible pull tab, stop here. That is a stretch-release strip, and it needs its own technique. Our guide to removing Command Strips covers that method, and it should be followed instead of the steps below.
Read the Surface Before You Touch the Hook
The surface decides the rules. The same peel that is harmless on tile can lift paint off drywall, so sort the wall out first.
Painted drywall, cured paint. This is the surface this guide is built around: warmth, a low peel angle, and patience. Risk rises if the paint was applied over unprimed drywall, because then the paint’s own bond can be weaker than the adhesive’s bond to the paint.
Fresh paint. If the paint still feels soft or smells strongly, wait — paint needs time to cure before it can stand up to an adhesive pull, and removing a hook from uncured paint is a common cause of peeled patches.
Tile, glass, and mirror. These are the most forgiving surfaces: adhesive releases easily from a hard, non-porous face. The risk here is the tool — a metal scraper is only ever acceptable on plain glass, with a fresh blade held almost flat.
Wallpaper, textured paint, and unfinished wood. Do not use these peel methods on wallpaper — the paper tears before the adhesive lets go. Heavily textured paint is nearly as risky, and unfinished wood absorbs adhesive into the grain. In all three cases, leave the hook in place or accept that a repair will follow.
What You Need Before You Start
- A hairdryer (low or medium heat — never a heat gun on a painted wall)
- Dental floss or thin fishing line, unflavoured and unwaxed if possible
- A plastic putty knife, an old credit card, or a plastic razor scraper
- A soft microfiber cloth and a fingertip for rolling residue
- Warm, soapy water and a clean cloth
- Isopropyl rubbing alcohol and a cotton swab, for tested-spot residue work
- A towel on the floor under the hook, to catch the hook and any crumbs of foam
What you do not need: a metal scraper, a razor blade, a metal putty knife, or sandpaper. On painted drywall, every one of those will do more damage than the adhesive would.
Method 1: Warm and Peel Slowly (Painted Drywall)
This is the default method for a foam-pad or thin-tape hook on a painted wall. It is slow on purpose.
Take everything off the hook first, and lift any hook cover off its base so you can see the whole pad. Hold the hairdryer a few inches from the pad on low or medium heat, moving it back and forth for 20 to 30 seconds. You are softening the adhesive, not heating the wall — if the paint feels hot, back off and let it cool.
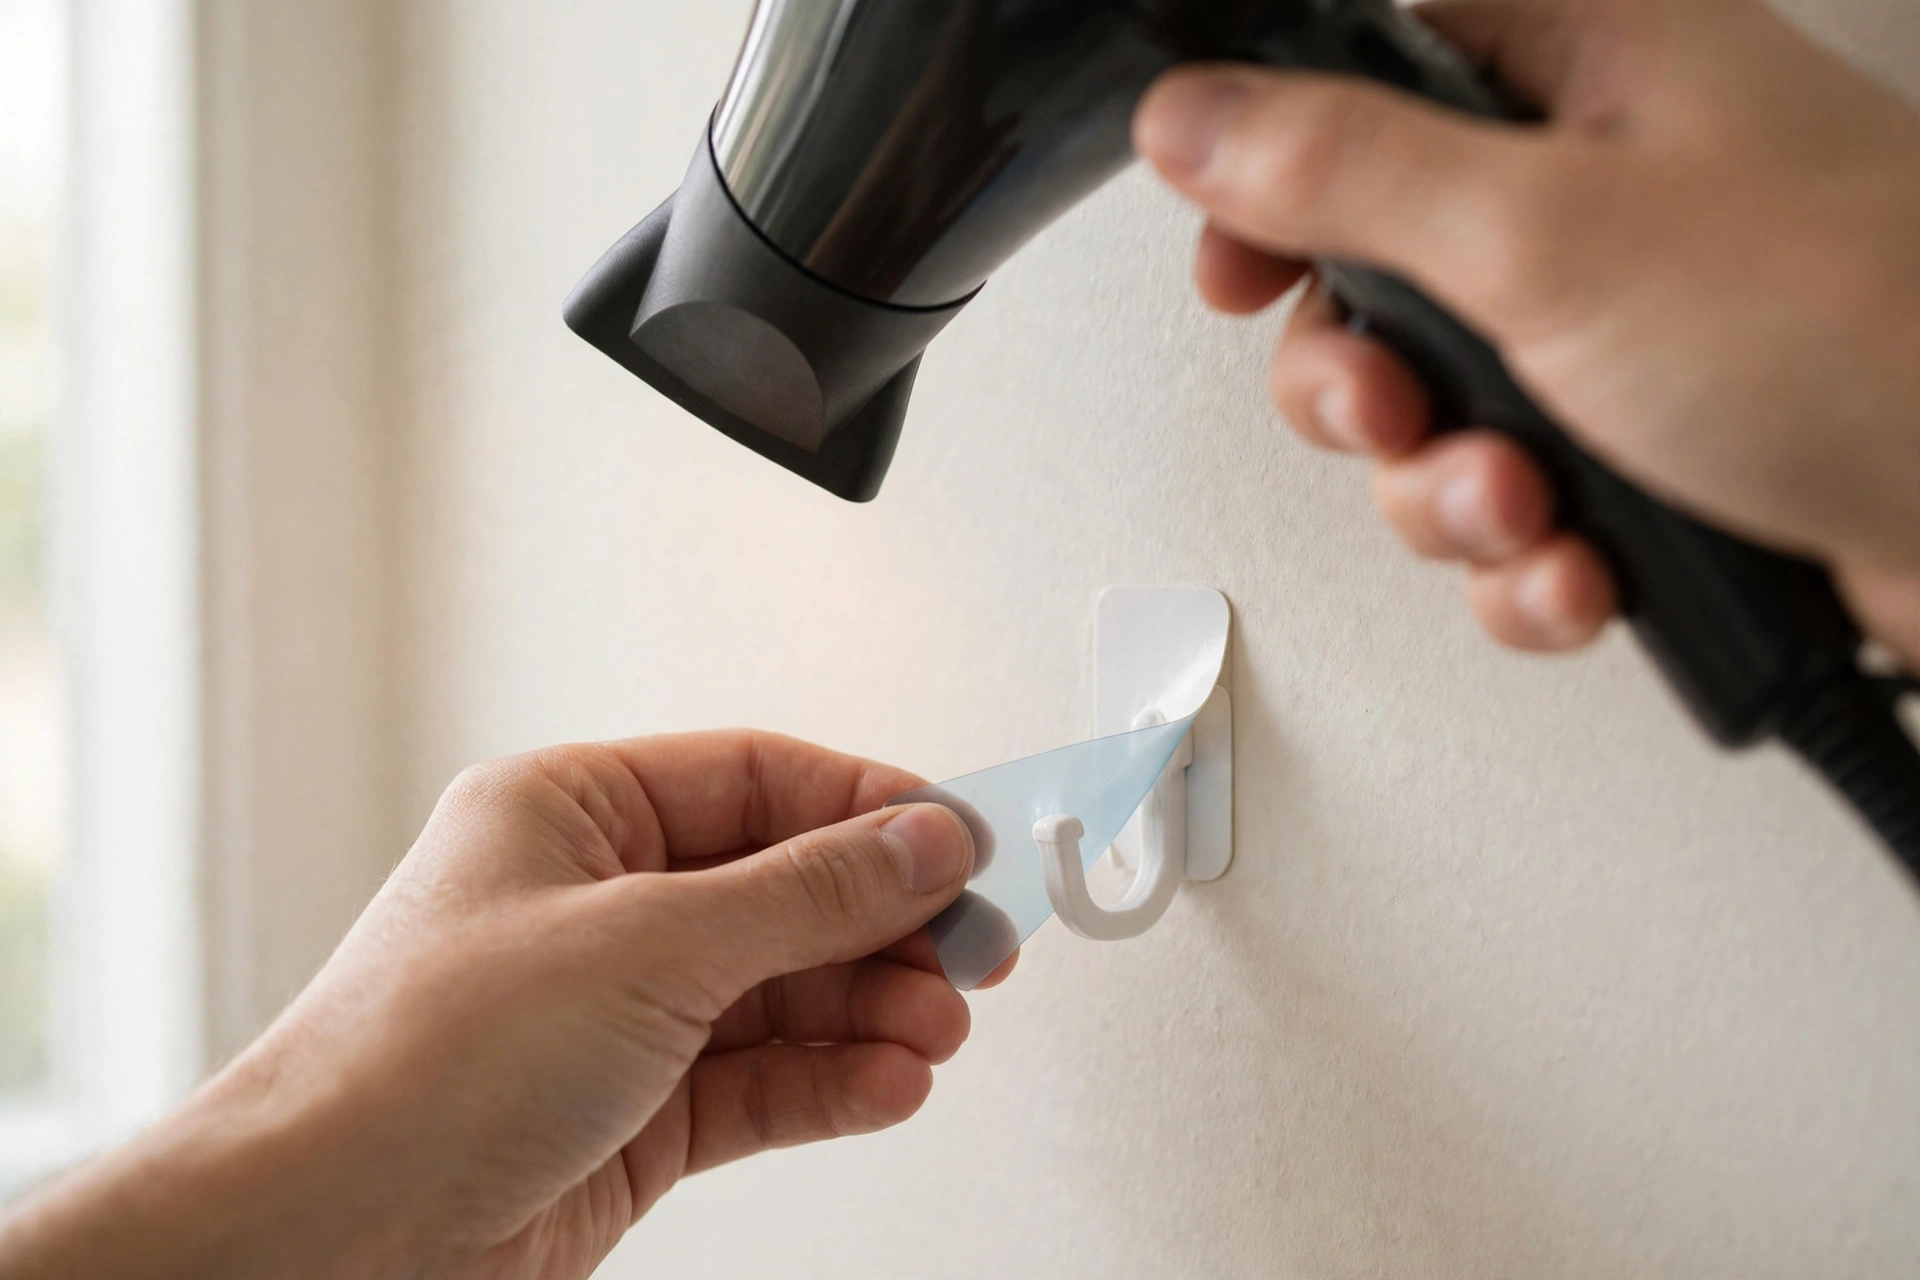
While the pad is still warm, work a plastic card under one corner — the top corner is usually easiest — and lift it just enough to get a grip. Then peel slowly, keeping the pad close to the wall and pulling at a low angle, almost parallel to the surface. If the pad cools and resists, reheat that section for another 20 seconds and carry on. A slow, warm peel leaves far less residue than a cold yank.
If the pad splits and leaves foam on the wall, do not dig at it. That leftover layer is exactly what Method 2 is for.
Method 2: Saw Through Thick Foam With Floss
Thick foam pads often refuse a clean peel: the foam tears in the middle, leaving half the pad on the wall and half on the hook. Floss solves this by cutting the foam itself, so the paint never takes the force.
Warm the pad first, as in Method 1. Then wrap dental floss or thin fishing line around your index fingers, slide it behind the top edge of the pad, and saw back and forth while moving slowly downward, keeping the line close to the wall. The line slices through the foam core without touching the paint.
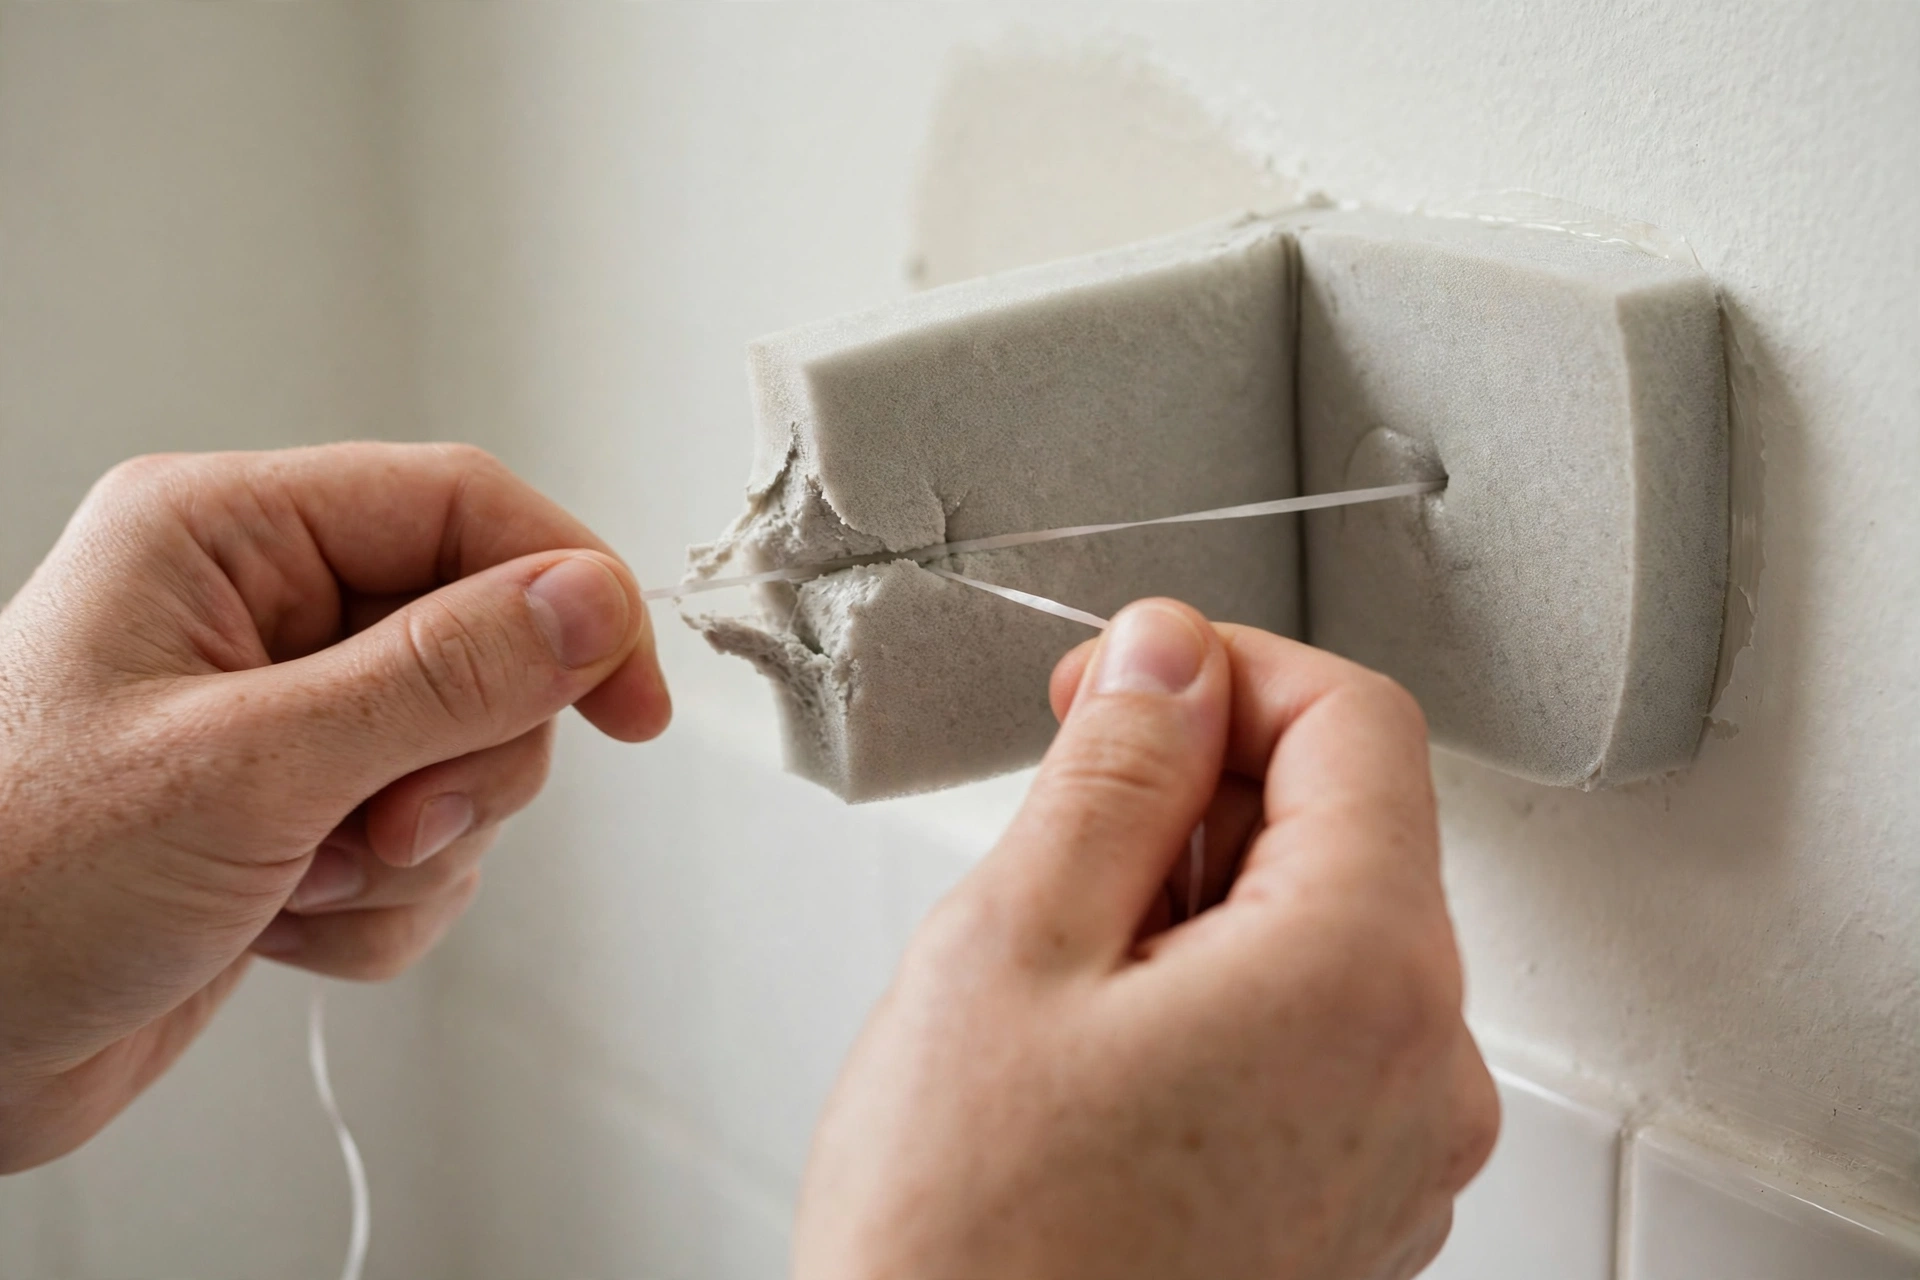
What is left is a flat layer of foam on the wall. Warm it again, then roll it off with a fingertip or a soft cloth, working in small sections and reheating as needed. Any thin sticky film left after the foam is gone is residue, and it gets a gentler treatment next.
Method 3: Tile, Glass, and Mirror — Firmer Rules, Same Patience
On tile, glass, or a mirror, the method barely changes: warm the pad, lift a corner with a plastic scraper, and peel slowly at a low angle. A plastic razor scraper clears most residue from tile and glass without scratching; on plain glass only, a metal razor scraper with a fresh blade held almost flat can shear off thick residue.
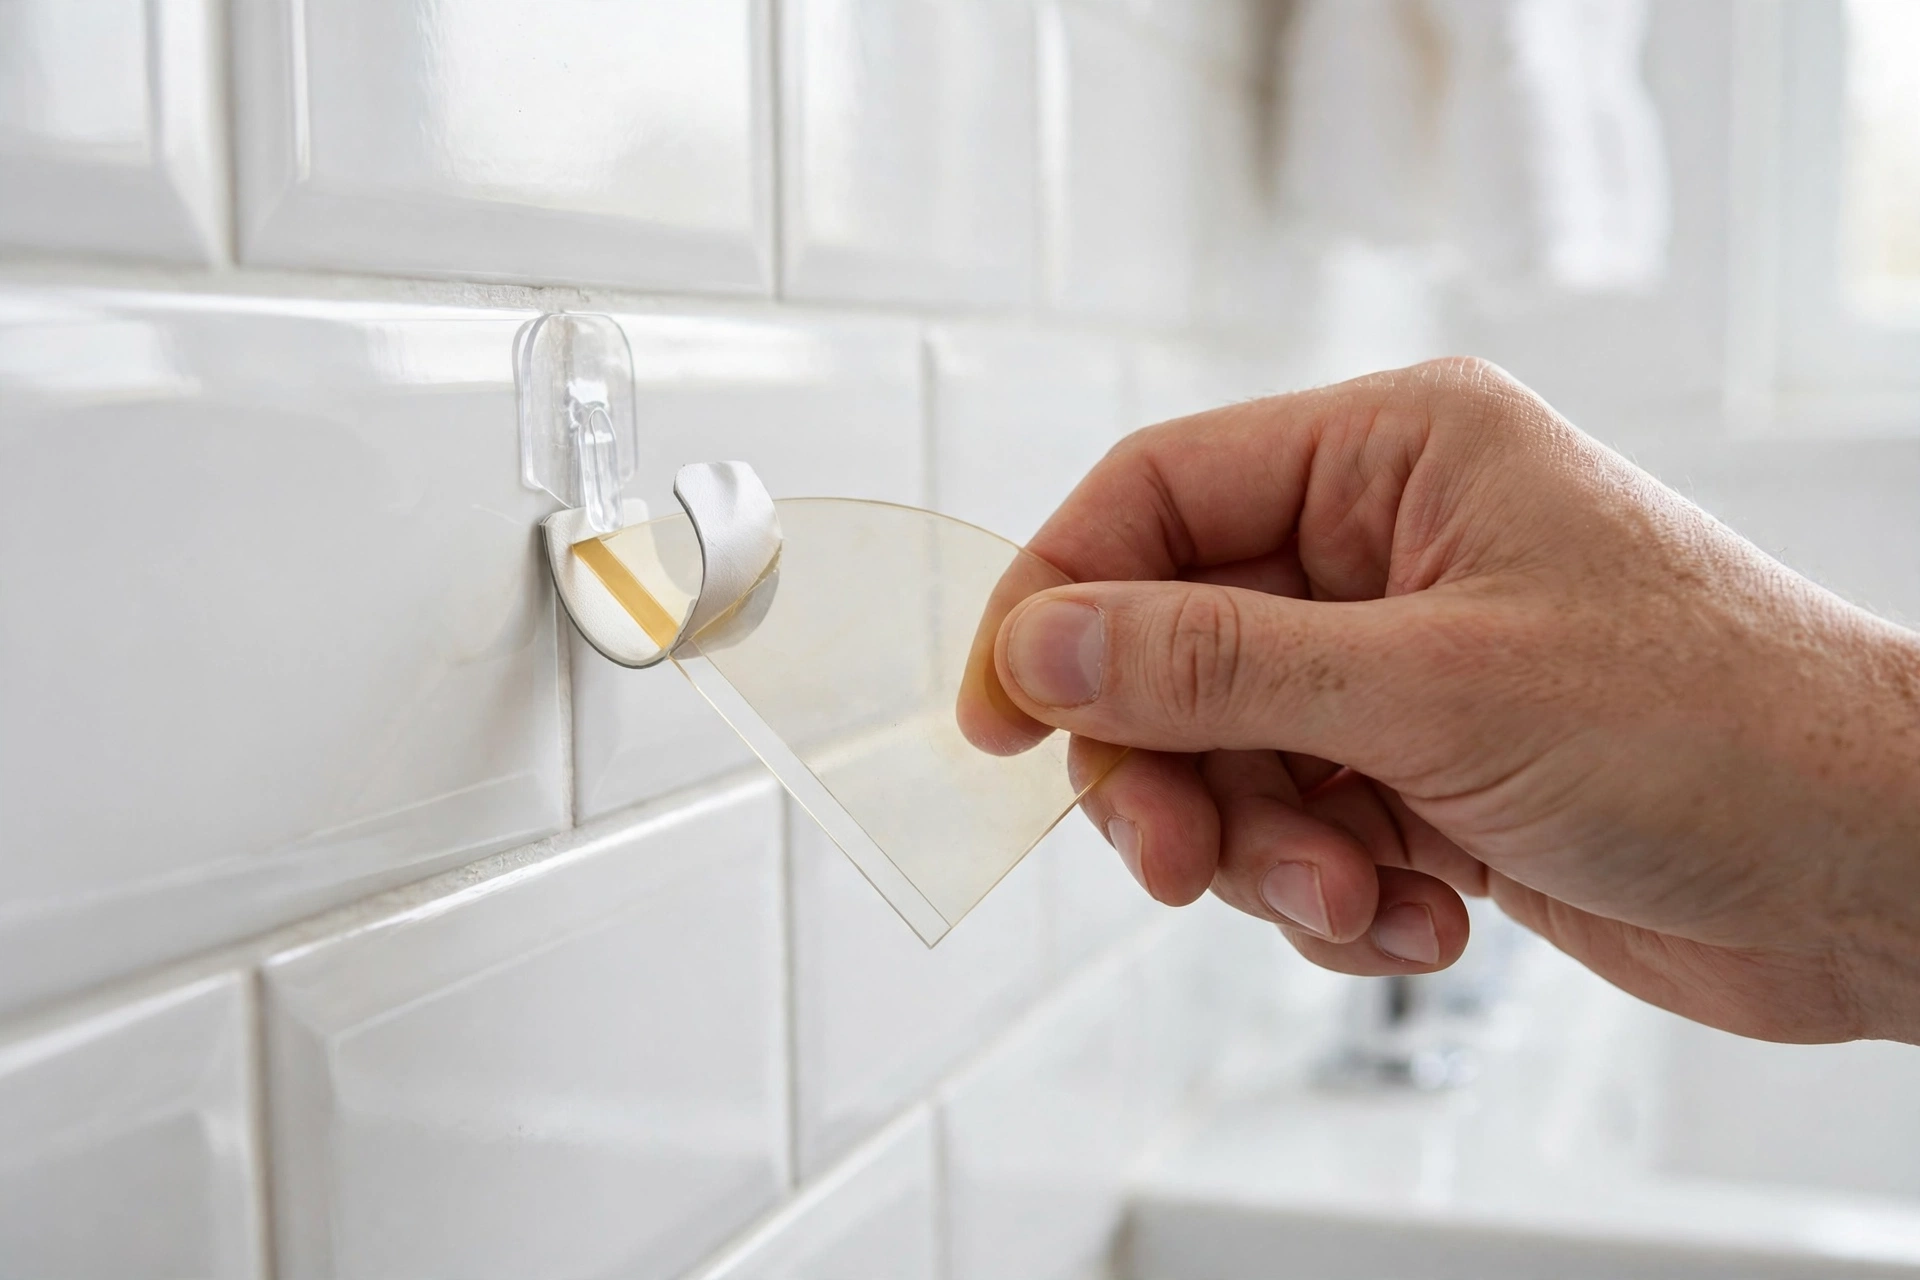
Two warnings still apply. Never use a metal scraper on a mirror’s edges or on coated or frosted glass — the coating is far more fragile than the glass itself. And grout lines are not tile: adhesive across a grout line should be warmed and rolled off, not scraped, because a blade will gouge the grout.
If you are replacing the hook, a suction-cup hook is often better for a wet tile wall — see our best suction-cup hooks. And if adhesive hooks keep failing in the same spot, a screw-in hook may be the long-term fix; our step-by-step hook installation guide covers that.
Remove the Residue, Gentlest First
Residue removal is where most paint damage happens, because people reach for the strongest solvent first. Work up this ladder instead, and stop at the first rung that works.
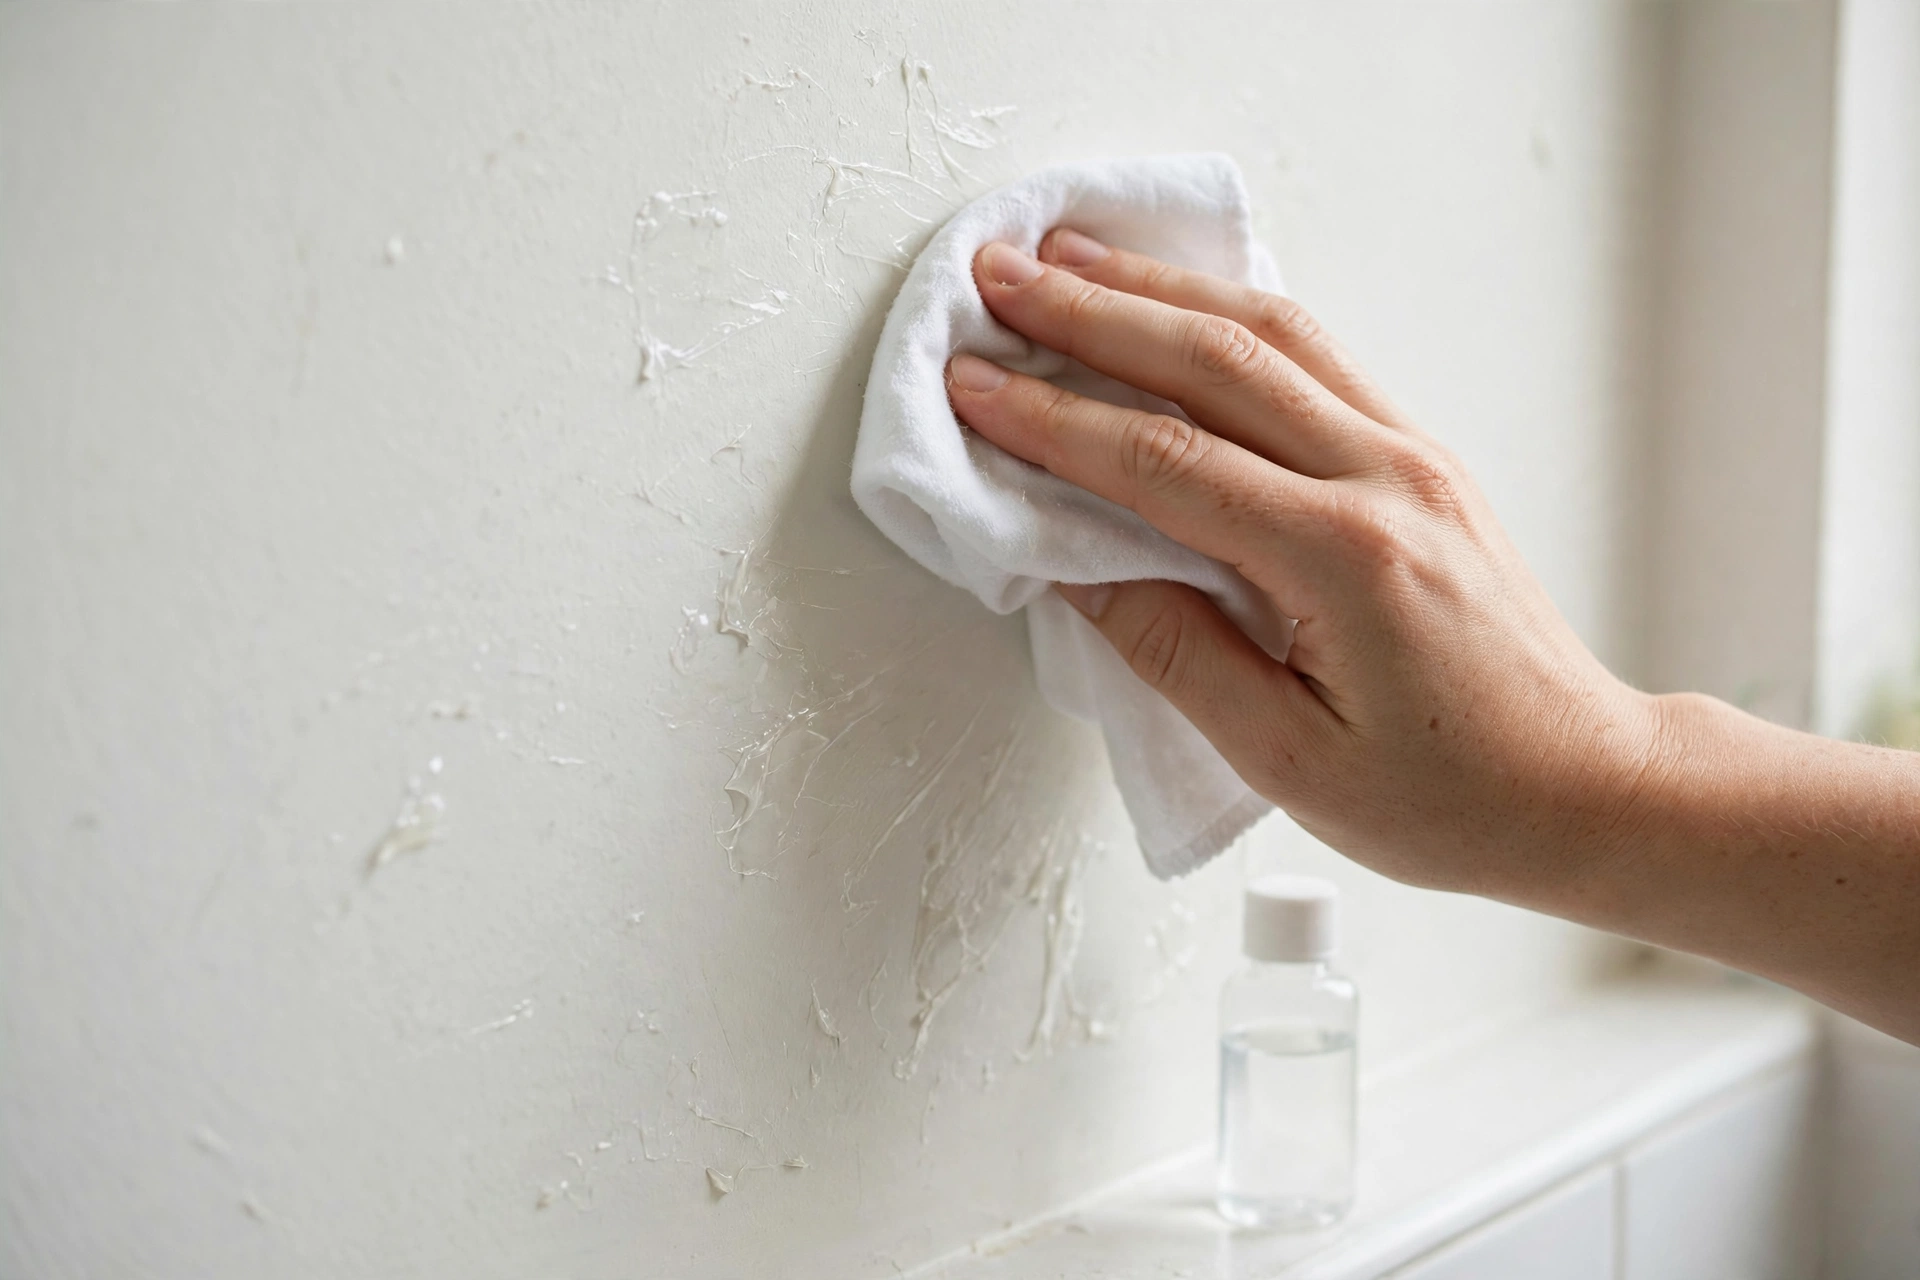
1. Roll it off dry. Rub the sticky patch with a fingertip or a dry microfiber cloth. Foam adhesive tends to ball up and lift away under light friction, and this alone clears most fresh residue.
2. Warm, soapy water. Dampen a soft cloth with warm water and a drop of dish soap, and wipe in small circles. This handles light residue and leaves nothing behind that needs cleaning up.
3. Isopropyl alcohol, on a tested spot first. Dab a little rubbing alcohol onto a cotton swab and work a small area. Before going further, test it on a hidden spot — behind a door, near the baseboard — and wait a minute to make sure it does not dull or lift the finish. Alcohol is generally kind to cured semi-gloss and gloss paint, and riskier on flat or matte finishes, which is exactly why the test spot matters.
4. A citrus-based adhesive remover, sparingly. For residue that survives alcohol, a citrus remover is the next step up. Apply a little to a cloth, not directly to the wall, let it sit briefly, then wipe. Wipe the area with a damp cloth afterwards so no oily film is left to collect dust.
What not to use on painted walls. Never use acetone or nail-polish remover on paint or a plastic hook base — it can dissolve the finish. Avoid oil-based pastes on painted drywall too: they can stain, and they belong on glass or metal. Never flood the wall with any solvent; a damp cloth is enough, and a soaked patch can soften the paint underneath.
If the Paint Lifts Anyway
Sometimes the wall was already compromised — old paint, a damp patch behind the hook, or a previous removal attempt that weakened the surface. If a chip of paint comes off, stop. Do not pick at the edges to see how far it goes; peeling further only enlarges the repair.
For a small chip, a dab of matching touch-up paint, feathered at the edges, usually makes it disappear. Renters should ask the landlord for the exact colour rather than guessing — a close-but-wrong white is more visible than the chip was. If brown drywall paper is showing, prime that patch first, because paint straight onto raw paper soaks in and dries blotchy.
A larger peeled area or paint that keeps lifting is a sign the wall itself needs attention — moisture or poor adhesion — and no removal technique will fix that.
Renter Move-Out Checklist
If the hook is coming down because a tenancy is ending, run through this before the final inspection.
- Remove the hook with heat and a slow peel, not a yank, and clear all residue before judging the wall.
- Check the patch in daylight from an angle — residue and small chips hide under bathroom lighting.
- Photograph the patch once it is clean, so there is a record of the wall’s condition.
- Touch up only with the landlord’s paint colour, and prime any exposed drywall paper first.
- Before putting a new hook up, check how high to install bathroom hooks so the next one goes up once, in the right place — every extra removal is another chance to damage the wall.
Before the next hook goes up, check how much weight adhesive hooks hold — an overloaded hook is also harder to remove cleanly later.
FAQ
For a hook with a pull tab, see how to remove Command Strips. For the next hang, our adhesive towel hooks guide covers which hooks suit which bathroom surface.