A shower caddy stays up when the fix matches its mount: lock a hanging caddy to the shower arm with a zip tie or hose clamp, re-seat suction cups on a cleaned, dry, smooth surface and wait 24 hours before loading them, and switch to a tension-pole design when the wall is textured or the cups keep failing. Most falls come from one of four causes — a loose neck, a broken vacuum seal, an overloaded or lopsided basket, or a surface the mount was never made for — and each one needs a different fix, which is why a single trick rarely works for every caddy.
We built this guide around that one idea. Instead of listing every hack in random order, we start by identifying the caddy in front of you, then give the fix that matches it, then cover the surfaces, the load, and the small routine that keeps it up for months. Competitor guides tend to mix hanging, suction, adhesive, and pole caddies into one long list; separating them is what makes the difference between a fix that holds and one that fails again next week.
Find Your Caddy Type in 30 Seconds
Before touching anything, work out which mount is actually holding the caddy. The answer decides the whole repair, so use this quick check first and then jump straight to the matching section.
| Caddy type | How to tell | First fix to try |
| Hanging (over the shower arm) | A hook or neck loops over the shower pipe; the basket hangs in the air | Zip tie or hose clamp below the hook |
| Suction cup | Round cups press flat against tile or glass; no screws, no pole | Clean, dry, re-press, wait 24 hours |
| Adhesive | Stuck to the wall with strips or tape; peels off rather than unscrews | Fresh waterproof strips on a degreased surface |
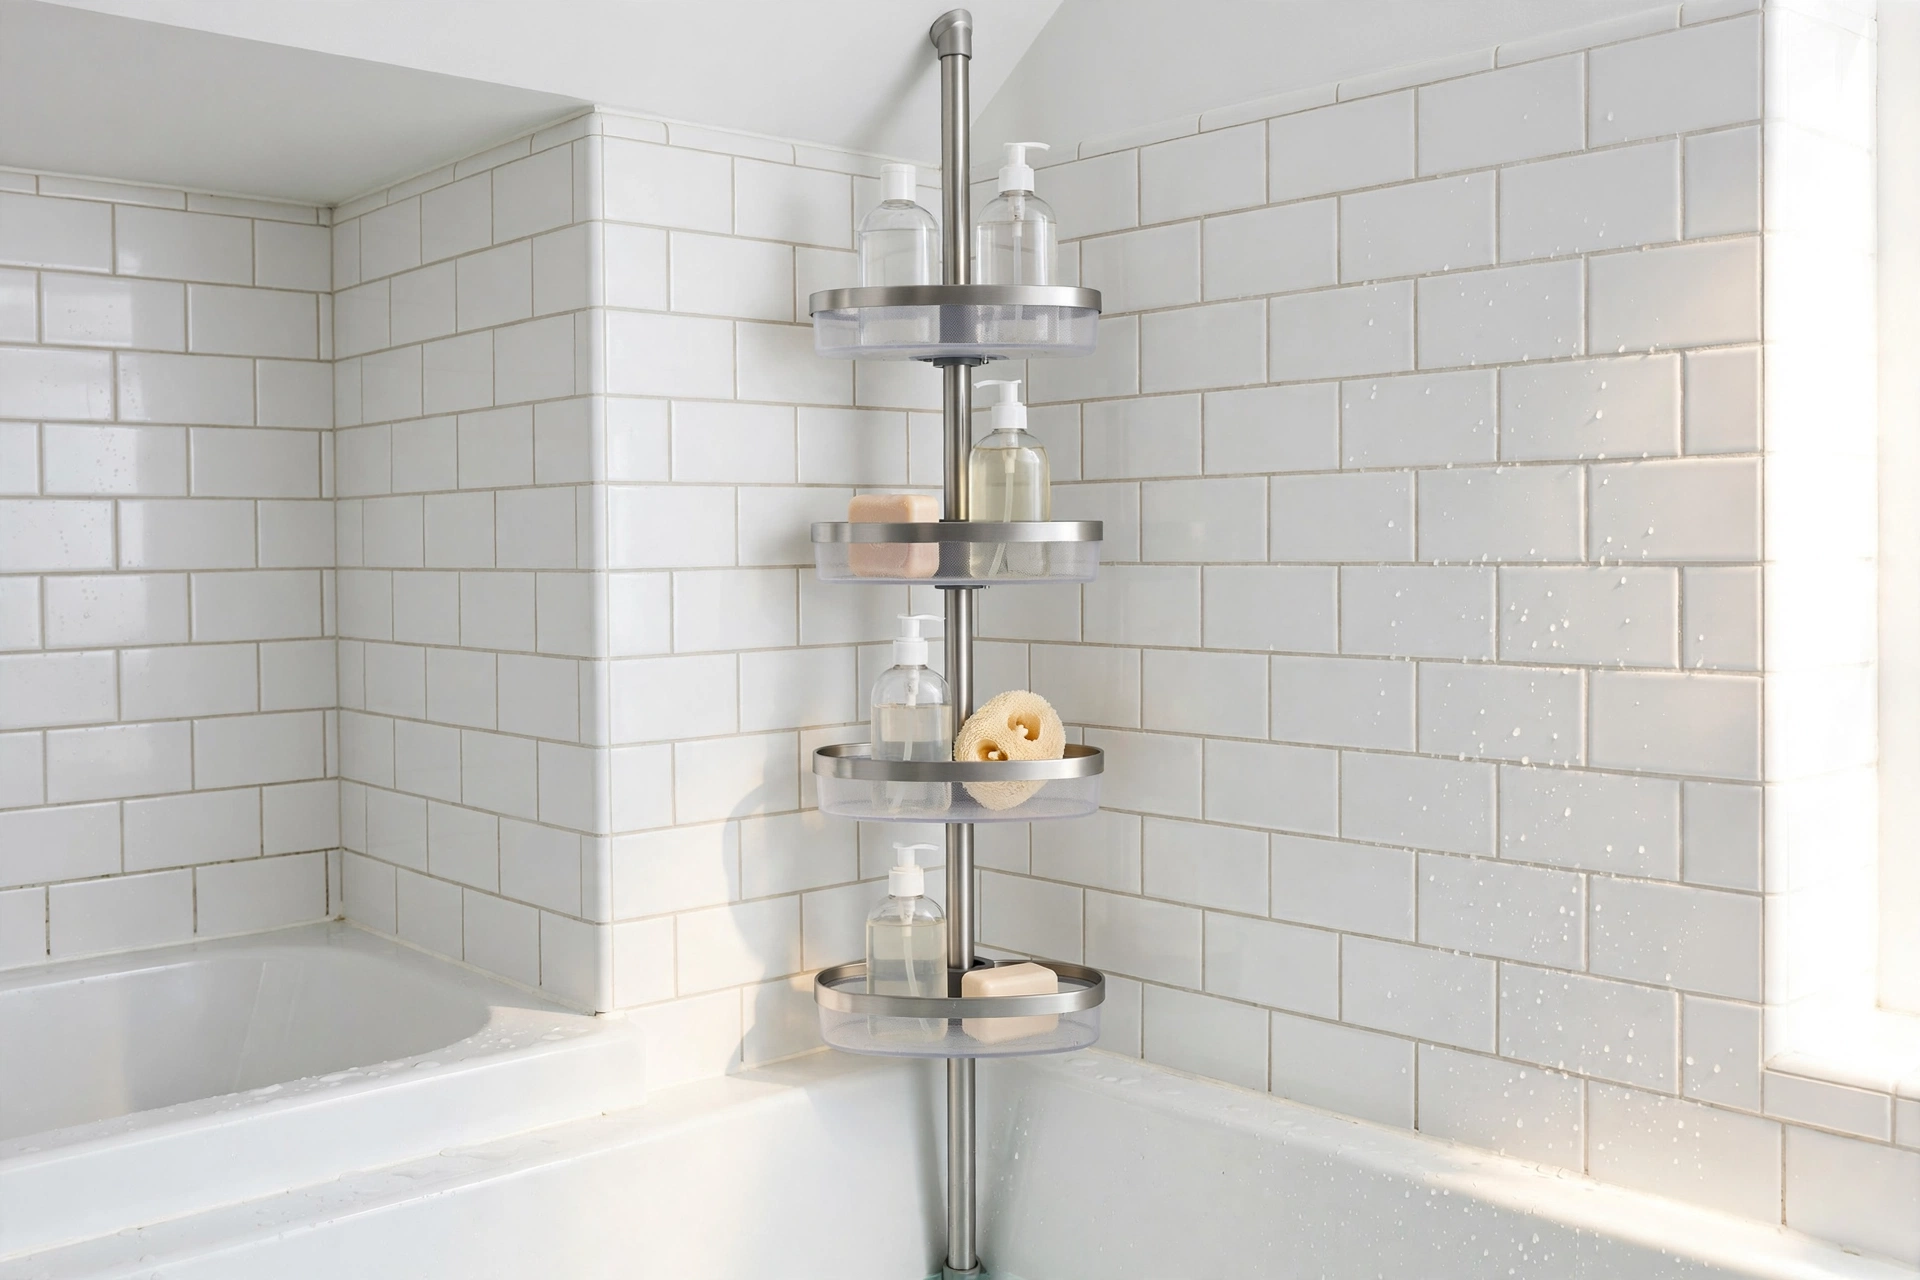
| Tension pole | A vertical pole wedged between the tub edge or floor and the ceiling | Re-tension the pole and level the shelves |
If the caddy uses two mounts at once — for example, a hanging hook plus a lower suction cup for stability — fix the main mount first. The lower cup only steadies the basket; it cannot hold the full weight on its own, and tightening it while the hook still slides will not stop the fall.
Why Shower Caddies Fall: The Four Failure Modes
Every fall we looked at traces back to one of these four modes. Naming the right one saves a lot of wasted effort, because a suction-cup trick cannot fix a loose neck, and a zip tie cannot fix a broken seal.
1. A loose neck on the shower arm
Most hanging caddies are made with an oversized neck so one design fits many pipe diameters. On a standard shower arm that leaves a gap, and the gap lets the caddy pivot and slide down the slight angle of the pipe, especially once bottles are added. Soap scum on the pipe makes the slide worse by cutting friction even further.
2. A broken vacuum seal
Suction cups hold only while the seal is airtight. Soap film, body oil, mineral deposits, a grout line under the cup rim, or a cup that has gone hard with age all let air creep in, and the grip fades slowly until the whole basket drops at once. Steam and daily temperature changes speed the process up.
3. An overloaded or lopsided basket
A heavy shampoo bottle on one side creates torque that twists the caddy off its mount, and a basket loaded above what its cups or hook can hold will fail even when the mount itself is fine. Tall bottles high up make the problem worse by raising the center of gravity.
4. The wrong surface for the mount
Suction cups need a smooth, non-porous surface. Textured tile, stone, fiberglass with a grain, and any spot crossed by grout lines will not seal reliably, no matter how clean they are. Adhesives have the opposite weakness: they bond well to smooth tile and glass but struggle on dusty, damp, or uneven finishes. Matching the mount to the wall matters more than the strength of any single fix.
Fix a Hanging Caddy That Slides Down the Shower Arm
This is the most common hanging-caddy failure, and it has the cheapest fix. The goal is simple: give the hook something it cannot slide past.
Zip tie stop (fastest fix). Push the caddy back up the arm to its proper position, then cinch a zip tie tightly around the shower arm directly below the hook. The tie becomes a physical stop, so the hook cannot migrate down the pipe. Two thin zip ties side by side spread the load more evenly than one, and trimming the tail flush keeps the result tidy. This turns a friction-based hanger into a mechanically locked one, which is why it outlasts rubber bands alone.

Build up the pipe. If the neck is visibly loose, wrap a few layers of electrical tape around the arm just below the hook before rehanging the caddy. The tape adds diameter and friction at the same time. Foam pipe insulation, cut to fill the gap between the hook and the showerhead, works the same way and is easy to remove later; a short length of pool noodle does the same job in a pinch.
Hose clamp (strongest stop). For a caddy that keeps defeating zip ties, a small stainless hose clamp tightened beside the hook will not budge. It costs very little, needs only a screwdriver, and suits a caddy that is staying put long-term. Keep it beside the hook rather than over it, so the hook still lifts off when the caddy needs cleaning.
Stop the tilt, not just the slide. A caddy can stay on the pipe and still dump its bottles if it rotates. A small bead of clear, removable silicone caulk or a dab of adhesive putty inside the top curve of the hook fills the gap between metal and pipe and damps the vibration that works the hook loose. Balance the load at the same time: heavy bottles in the middle or low, matched weight on both sides, and nothing tall and full hanging off one edge.
Fix a Suction-Cup Caddy That Keeps Dropping
Suction cups fail quietly. The seal weakens over days, then the basket falls during a shower. The fix is a proper re-mount, not a harder push on a dirty wall — and the order of the steps matters as much as the steps themselves.
Clean both surfaces. Take the caddy down and wash the cups and the wall with rubbing alcohol or a vinegar-water mix to cut soap scum, body oil, and mineral deposits. Rinse, then let both surfaces dry completely. Any trapped moisture under a cup becomes an air pocket as it evaporates, and that pocket is what breaks the seal later.
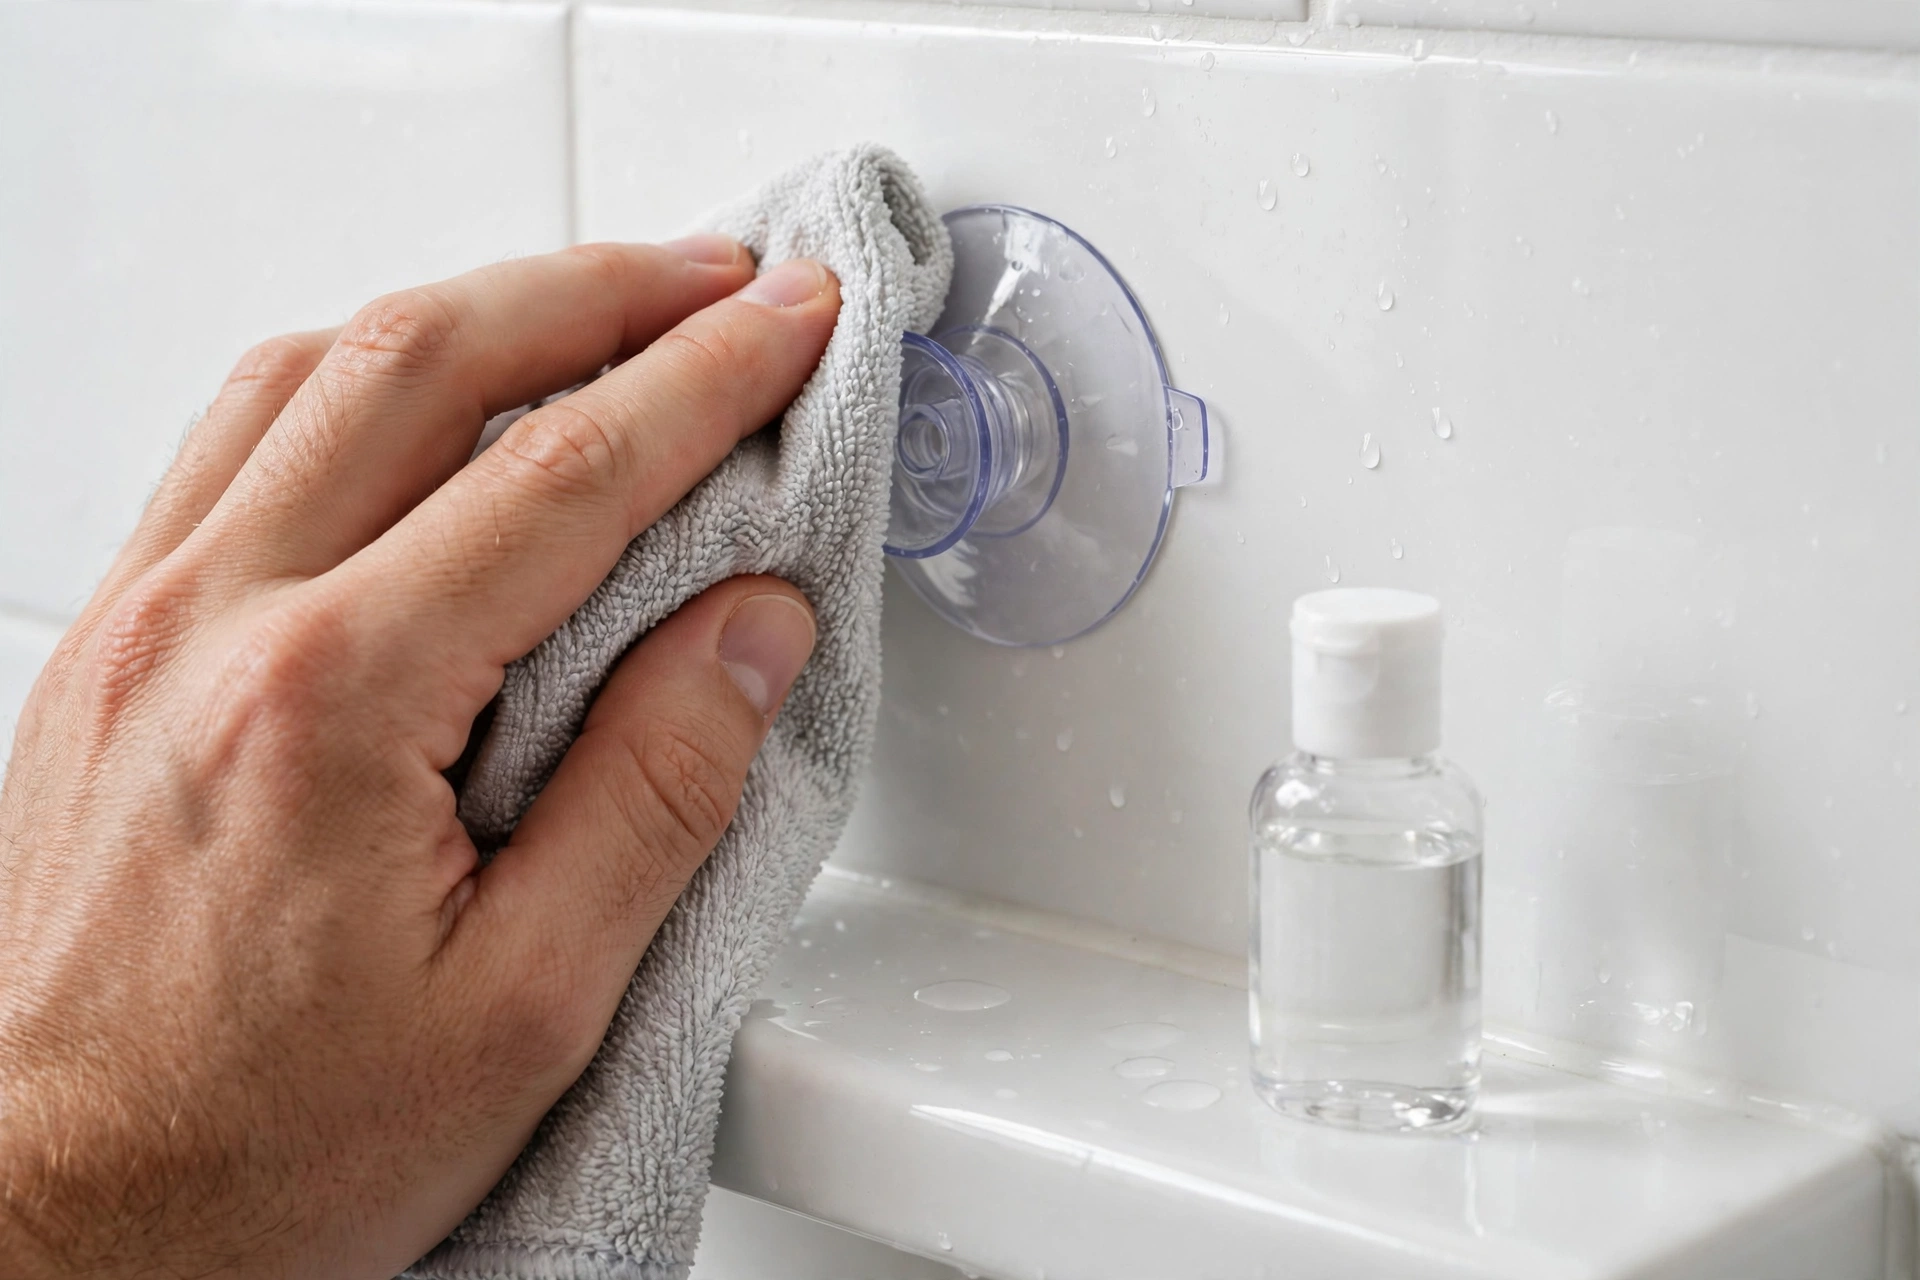
Revive or replace old cups. Cups that have gone stiff will not conform to the wall, however clean it is. A brief dip in near-boiling water for about 30 seconds softens older cups so they dome properly again. A thin film of petroleum jelly or cooking oil around the inner rim fills microscopic gaps and helps the seal hold; use only a trace, since excess grease does the opposite. If a cup is cracked, flattened, or stays hard after warming, replace it — no cleaning trick restores a dead cup.
Press, then wait. Press each cup firmly onto the wall for about 30 seconds to push all trapped air out, working from the center of the cup outward. Then leave the caddy completely unloaded for a full 24 hours before putting bottles back in. Loading it straight away is the single most common reason a freshly cleaned cup fails again, because the seal never gets time to set.
Burp the cups now and then. Over weeks, tiny amounts of air still find their way in. Pressing the center of each cup briefly every so often — sometimes called burping — pushes that air out and keeps the grip tight. If a cup needs burping every few days, treat that as a warning: the cup is wearing out or the surface is not smooth enough, and the next section applies.
Fix an Adhesive Caddy That Peels Away
Adhesive caddies sit between suction cups and screws: stronger than a cup, less permanent than a drilled shelf. When one peels, the bond has usually failed at the wall, not in the strip itself.
Remove the old strip completely, degrease the wall with rubbing alcohol, and let it dry fully before applying a fresh heavy-duty waterproof strip made for wet environments. Press the strip firmly for at least 30 seconds, then respect the cure time on the packet — usually a full day — before loading the caddy. The same 24-hour rule that applies to suction cups applies here, and skipping it is the most common cause of a repeat peel.
Renters should pause before the strongest option. Silicone sealant or construction adhesive under a caddy creates a very strong, watertight anchor, but it is semi-permanent and can damage paint or finish on removal. For a rental, fresh waterproof strips or a tension-pole design are the safer choices, and the damage risk is worth weighing before reaching for sealant.
Where Each Fix Fails: Surface Compatibility
If a fix keeps failing on the same wall, the wall is usually the problem, not the fix. Use this table before buying anything or re-mounting for the third time.
| Wall surface | Suction cups | Adhesive strips | Hanging / pole |
| Smooth glazed tile, glass | Best case — seal holds well | Best case — strong bond | Unaffected by the wall |
| Textured or matte tile | Poor — air leaks through the texture | Fair — needs a fully flat contact patch | Best choice — bypass the wall entirely |
| Grout lines under the cup | Fails — the groove breaks the seal | Fair if the strip spans flat tile only | Unaffected by the wall |
| Fiberglass or acrylic surround | Mixed — works only on flat, smooth panels | Good on clean, smooth panels | Pole needs a solid ceiling or tub edge |
| Natural stone, porous finishes | Poor — pores break the seal | Poor — weak, uneven bond | Best choice — bypass the wall entirely |
The pattern is consistent: the rougher or more porous the wall, the less any wall-stuck mount can be trusted, and the stronger the case for a hanging or pole design. Tile finish matters here too — if the shower is tiled in a textured or small-format style, our tile shower ideas for small bathrooms show how different tile choices change both the look and the practical storage options in the same space.
Lighten and Balance the Load
Even a perfect mount fails under a bad load, so audit what the caddy actually carries. Take everything out, then put back only what gets used every shower. Half-empty bottles, duplicates, and products nobody has touched in weeks are the usual dead weight, and removing them often fixes a “falling” caddy without touching the mount at all.
Reload with a simple rule: heaviest bottles low and toward the center, matched weight on the left and right, and nothing tall and full perched on one edge. Try the one-bottle-out test — if removing a single heavy bottle stops the slide or tilt, the caddy was overloaded, not broken. Decanting a giant family-size bottle into a smaller shower bottle also helps, since it lowers both weight and height at once.
The 2-Minute Monthly Check That Keeps It Up
Most caddies do not fail overnight; they fade over weeks. A short monthly check catches that fade while it is still fixable. Once a month, press each suction cup firmly back onto the wall, wipe soap film off the cups and the contact patch, check the hanging hook for slide, and re-tighten any zip tie or clamp that has worked loose. At the same time, flex each cup: a cup that stays stiff, cracked, or flattened is telling you it needs replacing, not another cleaning.
This routine also protects the caddy itself. A frame that is constantly sliding and catching corrodes faster at its joints, and once rust starts, the structure weakens from the inside. If the frame is already showing rust, read our guide on why shower caddies rust and which finishes survive daily steam before deciding whether the caddy is worth saving.
When to Stop Fixing and Replace It
Some caddies are past fixing, and recognizing that saves more frustration than another round of tape and cups. Replace rather than repair when the wire frame is cracked or bent out of shape, when the hanging neck is so wide it cannot grip any pipe even with a build-up, when suction cups stay hard or cracked after warming, or when the wall itself rules out every wall-stuck mount. A caddy that has fallen three times after proper re-mounts has already given its answer.
The replacement that sidesteps all four failure modes is a tension-pole caddy: a spring-loaded pole wedged between the tub edge or shower floor and the ceiling, with shelves stacked along it. Because nothing sticks to the wall and nothing hangs from the pipe, steam, texture, and grout lines stop mattering. Measure first — floor-to-ceiling height in a walk-in shower, or tub-edge-to-ceiling height in a tub shower — and check that the pole’s tension mechanism locks firmly before loading it. Position the shelves so the heaviest bottles sit low, and hang the caddy at a height that is easy to reach; our guide on how high to install bathroom hooks covers the comfortable reach heights that apply to shower storage too.
For more shower storage ideas, browse our shower accessories guides. The short version of this whole guide is worth repeating: match the fix to the mount, respect the 24-hour wait, keep the load balanced and low, and when the wall or the frame defeats every fix, switch to a design that does not depend on either.