Most robe hook installs start with the same problem: a cheap plastic hook that keeps falling off. The range runs from the $5 ones that rust in six months to the heavy stainless-steel monsters that live in steamy showers and never move.
This guide covers the install from start to finish. It covers the mistakes that almost ruin the job and the small tricks that make the difference. Grab a coffee, sit down, and let’s walk through it step by step.
Quick answer: Install a robe hook at 65–70 inches in about 10 minutes — mark the spot, drill tile with a diamond bit (hammer mode OFF), set a toggle anchor, and mount. No stud? Toggle bolts hold 25–50 lbs. Full step-by-step below, plus no-drill options.
Disclosure: We may earn a commission when you buy through links on this page, at no extra cost to you.
Choosing the Perfect Spot
The first thing that matters is choosing the right spot. Guess, and you’ll usually spend ten minutes fixing it afterward. The hook needed to be 67 to 70 inches from the floor — that’s the exact height where you can reach with one hand while hanging a heavy robe without stretching like an idiot. And it had to be 8 to 10 inches out from the shower glass so the robe doesn’t drag on the floor and stay wet.
Step back, look at the layout, and mark the spot twice with a pencil before you drill. That single decision turns a 30-minute nightmare into a five-minute win. For wall-mounted towel options once the spot is set, see the best wall-mounted towel hooks.
Tools That Actually Matter
You don’t need fancy tools for this job. The kit that covers it:
- The robe towel hook you’re installing (obviously)
- A good drill and the right bits (3/16″ for wood screws, 1/4″ for anchors)
- A level — even half a degree off looks crooked for years
- Tape measure and pencil
- The screwdriver or hex key that came with the hook
- Drywall or tile anchors (go one size bigger so nothing cracks)
- Optional: Stud finder for maximum strength
These aren’t expensive. If you’re starting fresh and want a solid kit for this kind of bathroom work, the set below covers it. Amazon Basics 173-Piece General Household Hand Tool Set
Step-by-Step: The Full Install
Step 1 – Mark the Holes
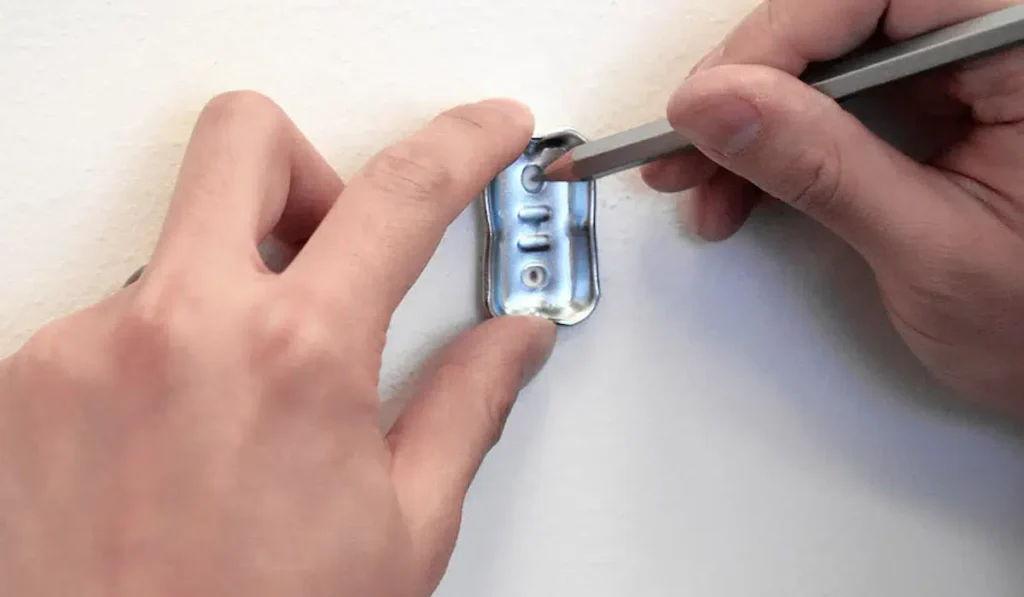
Don’t just hold the hook and hope. Hold it flat against the wall, used the level to make sure it was dead straight, and marked the holes twice — once with the hook pressed tight, once with a pencil. The double-check matters when there’s a stud right behind the spot. Without it, the hook can end up crooked forever.
Step 2 – Drill the Holes
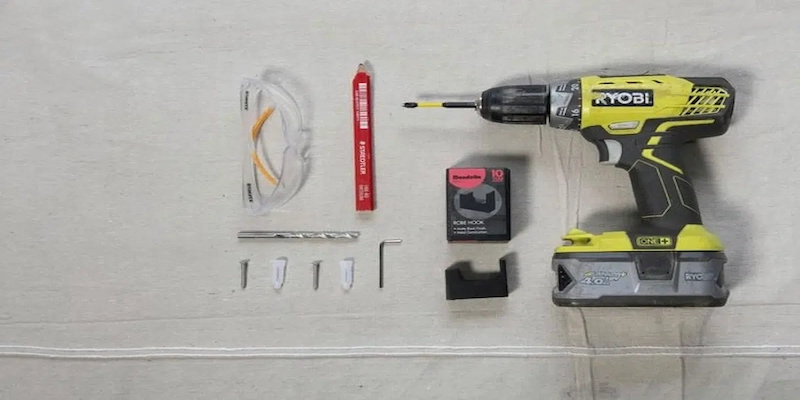
- Drywall? 3/16″ bit for wood screws. If you’re using anchors, 1/4″.
- Tile? Masonry bit + tile anchors. Go one size bigger — drywall anchors can crack tile.
- Wood stud? Skip anchors completely and screw straight in. This is the strongest option of the three.
Drill carefully, don’t rush. The wall thanks you later.
Step 3 – Mount the Plate
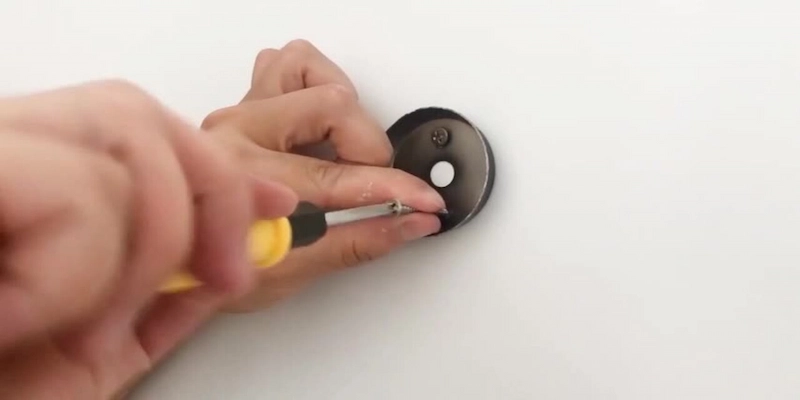
If your hook comes with a separate mounting plate (most good ones do), slide it over the holes exactly. Tighten the screws snugly — a screw gun is faster, but hand-tight is perfect. Check the level again. If it’s not straight, start over. A crooked plate turns a nice hook into a disappointment. This is the step most people get wrong — rushing it costs an extra hour to fix.
Step 4 – Attach the Hook
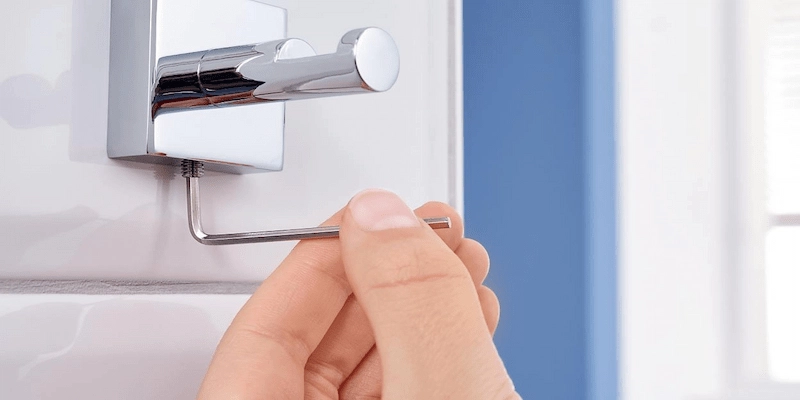
Line it up, slide it on, and tighten the pressure screw at the bottom with the Allen key. Give it a solid tug. It should feel rock-solid. That’s exactly how a solid install feels.
Drilling Tile Without Cracking It
Here’s how to install towel hooks on tile without turning it into a mosaic of cracks: use a diamond or carbide-tipped tile bit — never a standard twist bit, which will skate and chip the glaze. Put masking tape over your mark so the bit has something to bite, and drill at slow speed with the hammer function OFF.
Drip water on the spot as you go to keep porcelain cool — heat is what cracks it. Once you’re through the glaze, switch to a masonry bit for the substrate behind. And when possible, drill through grout lines instead of tile: a cracked grout joint is a ten-minute fix; a cracked tile is a weekend.
No-Drill Alternatives
Don’t want to drill at all? Adhesive hooks work on smooth tile or glass — but give them the full 24-hour cure before hanging anything. Suction cups are fine for washcloths only, and over-the-door hooks give you zero-commitment hanging. For more capacity without drilling, a towel ladder is the sturdiest no-drill option. But robes are heavy — for daily robe duty, a screw-mounted hook into a stud or toggle anchor is far more reliable than any no-drill alternative.
Tips for a Hook That Stays Put
- Never over-tighten — one strip and the hook is useless forever.
- For glass shower doors: Stop drilling completely. Switch to suction-cup hooks or through-glass screws instead. Our full guide to the best glass shower door hooks — if you want exact recommendations that withstand humidity and look amazing, check the links.
- Install a second hook right next to it — this is the #1 upgrade everyone is asking about in 2026. It changes everything. Still on the fence about hooks altogether? Our hooks vs bars comparison settles it.
- Test it immediately: Hang a full bath towel and a robe at the same time. If it feels loose, move to a stud or add another anchor.
Common Mistakes (And How to Fix Them)
A few bad habits account for most failed installs. The biggest ones:
- Hanging it too low (it feels unsafe).
- Forgetting the level (it looks crooked for years).
- Using the wrong drill bit on tile (cracks appear everywhere).
Each one wastes hours. Avoid all three.
The Takeaway
You don’t have to be a professional to do this right. In under 10 minutes you can have a hook that looks factory-installed and actually works every single day. A well-placed hook turns a bathroom that looks like a cheap hotel into a space that feels like a real home — and this step is the easiest way to do it.
Got a photo of your bathroom or the exact hook you’re installing? Drop it in the comments. Tell us the wall type (drywall, tile, stud, glass?) and we’ll help you work out the right fix for it.
Need the best 2026 robe towel hooks that survive humidity and look expensive? Check the links “best robe towel hooks 2026”.